You can create Tasks in Basil and assign them to yourself as the Account Owner, Team Members, or Primary/Client Users, for any work that needs to be performed. You may also mark tasks as unassigned to allow team members to pick them up when ready. When you create a task, you can provide additional detail corresponding to the task so the assigned user has the information needed to complete the task and log time spent to perform the task. Multiple time logs can be created for each task. Tasks help you keep track of the status of work performed at all times and bill your clients accurately. We recommend that you use Tasks for all work performed for accurate tracking.
You can create one of many pre-selected tasks or a free-text task, and provide the details relevant to each type of task. You can use Tasks for tracking progress and time performed, but you can also simply log time by creating a ‘Log Time’ task or by using Timesheets.
New tasks can be created from each of the three Task views (Placard, List, and Spreadsheet).
1. Click on the 'Tasks' tab at the top of Basil. From this page, you can click on '+ Tasks'.
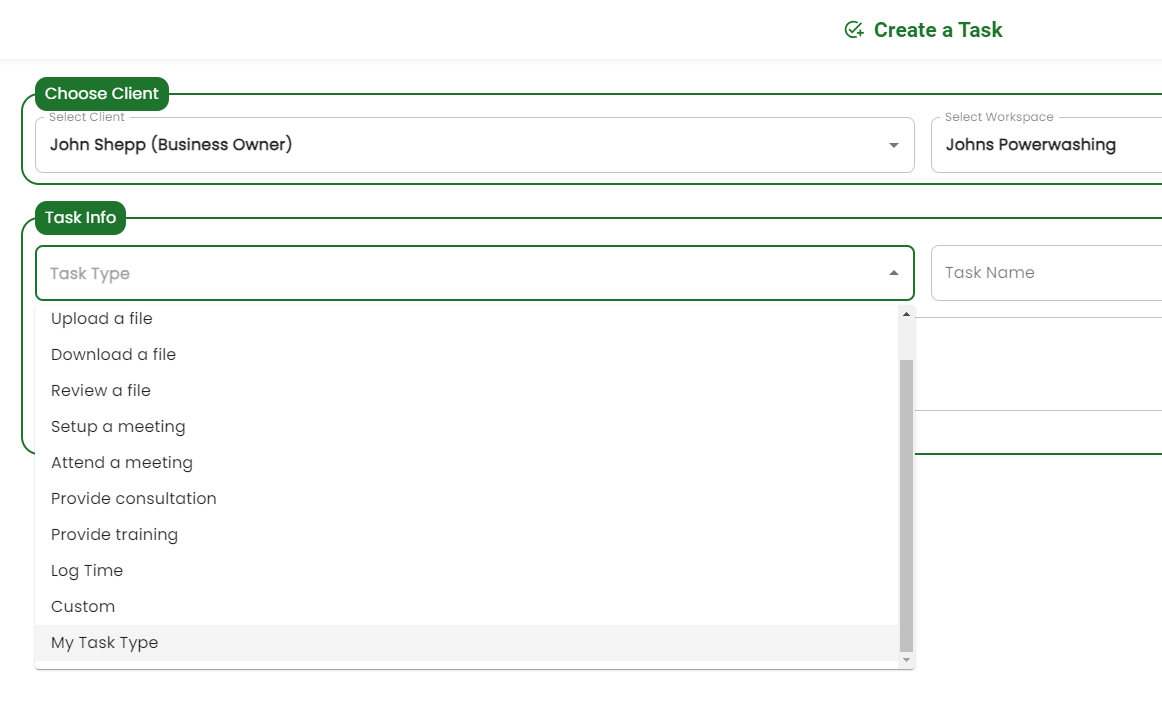
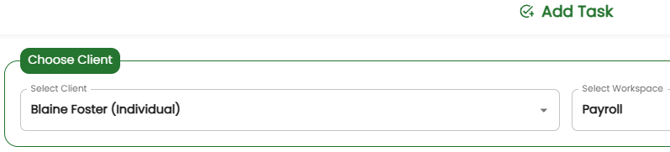
2. This will open the Create a Task window. Here you will need to select the Client and the Workspace that the task(s) are going to be for. If a client has multiple workspaces, a workspace is optional and not necessary.
3. Choose Client - The select Client drop-down menu will show all the Clients you’ve added to Basil. Please view the ‘Add Clients’ help guide if you need to add a Client.
-
- If the selected Client has more than one Workspace, the Workspace drop-down menu will show that Client’s Workspaces. Please view the ‘To create a Workspace’ instructions if you need to create a Client Workspace.
-
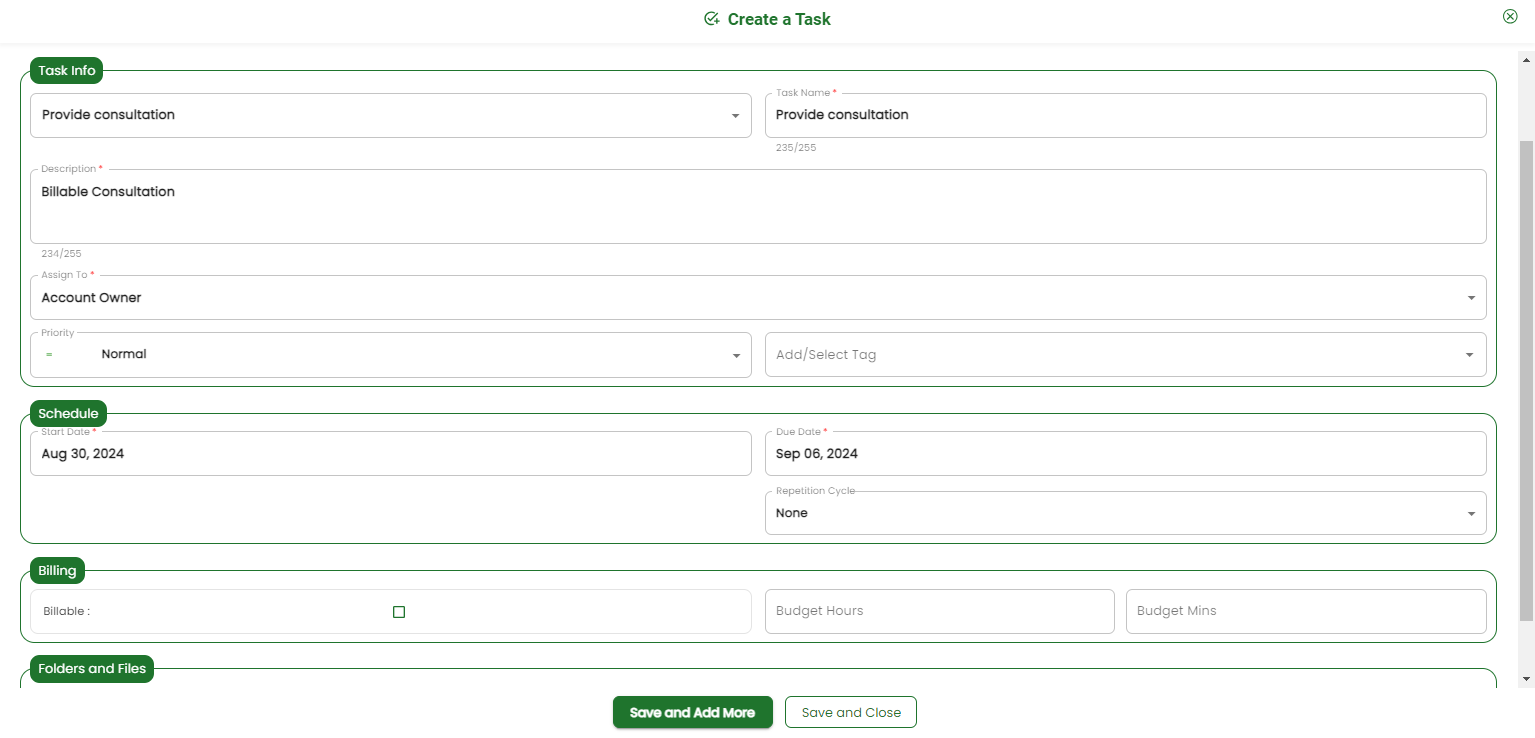
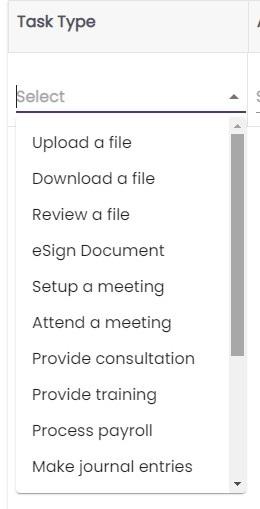
- Use the ‘Title’ field to choose from a number of preset task options or type the name of your Task as freeform text. You may create your own Task Types to add to this list by following the steps listed below in Creating New Task Types.
- Assign the Task to one or multiple users, or leave it unassigned.
- You may add a Description, Priority, and Tag for searching.
-
- Set the Start and Due Dates for the Task. By default, the Start Date will be today and the Due Date will be seven days from today.
- If you add a Repetition Cycle, a new occurrence of the Task will be created on that day in the future. For example, if today is the 15th of October and you set a Monthly repetition, then the next Task occurrence will be November 15th. You can disable the creation of new occurrences by either changing the Repetition Cycle field to ‘None’ on the most recent Task occurrence.
- If the ‘Setup a meeting’ or freetext Task Type is selected, a ‘Calendar’ field will appear.
6. Billing - You can set your Tasks to be billable to be used with Invoicing once the Tasks are worked on.
7. Folders and Files - Some Task Types allow you to add an Attachment. There are certain Task Types that require you to select a File Path:
-
- The ‘Upload a file’ task will ask you to select which folder you’d like the assigned user to upload to.
- The ‘Download a file’ and ‘Review a file’ tasks will ask you to select the specific file you’d like the user to perform the task for.
- The ‘Setup a Meeting’ task will ask to select a user’s calendar where the meeting will be added.
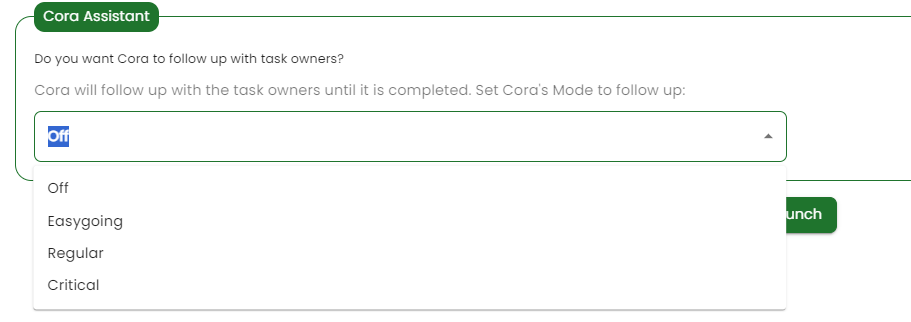
- In an ‘Easygoing’ mode, Cora will send an email reminder to the task owner once every 72 hours, until the task is completed.
- In a ‘Regular’ mode, Cora will send an email reminder to the task owners once every 48 hours, until the task is completed.
- In a ‘Critical’ mode, Cora will send an email as well as a text reminder once every 24 hours until the task is completed. The task owner needs to have verified their mobile phone number to receive text messages. Phone carrier SMS text charges may apply.
- Custom follow-up modes can also be configured in the Account Owners 'Settings' menu.
- Cora Assistant can also be activated or edited after launching a task by clicking the pencil icon to the right of the Task Card to edit the task.
- When done, you can click ‘Save and Add More’ to add more tasks or ‘Save and Close’.
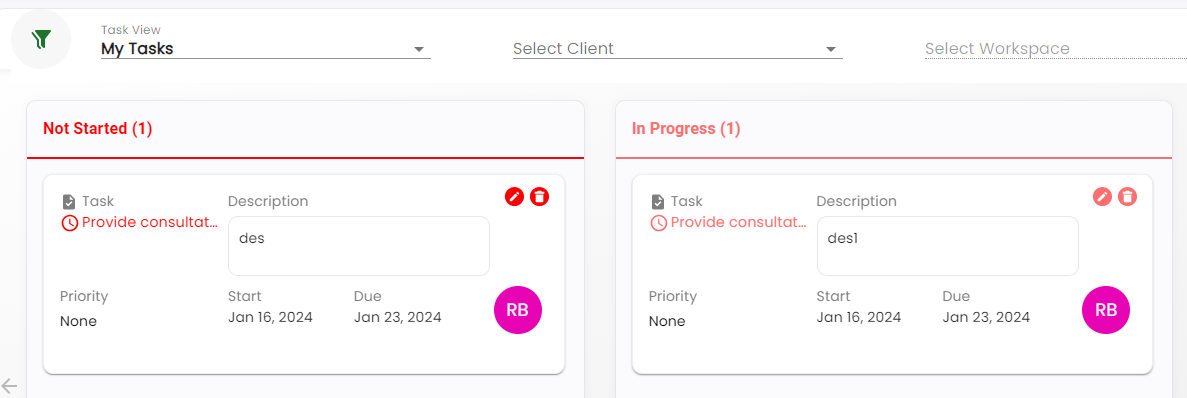
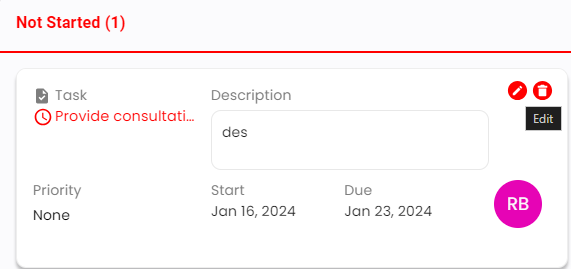
- After adding your Tasks, you will then be brought back to the Tasks screen. The following is a screenshot of the new task in each of the three task views available.
Placard View
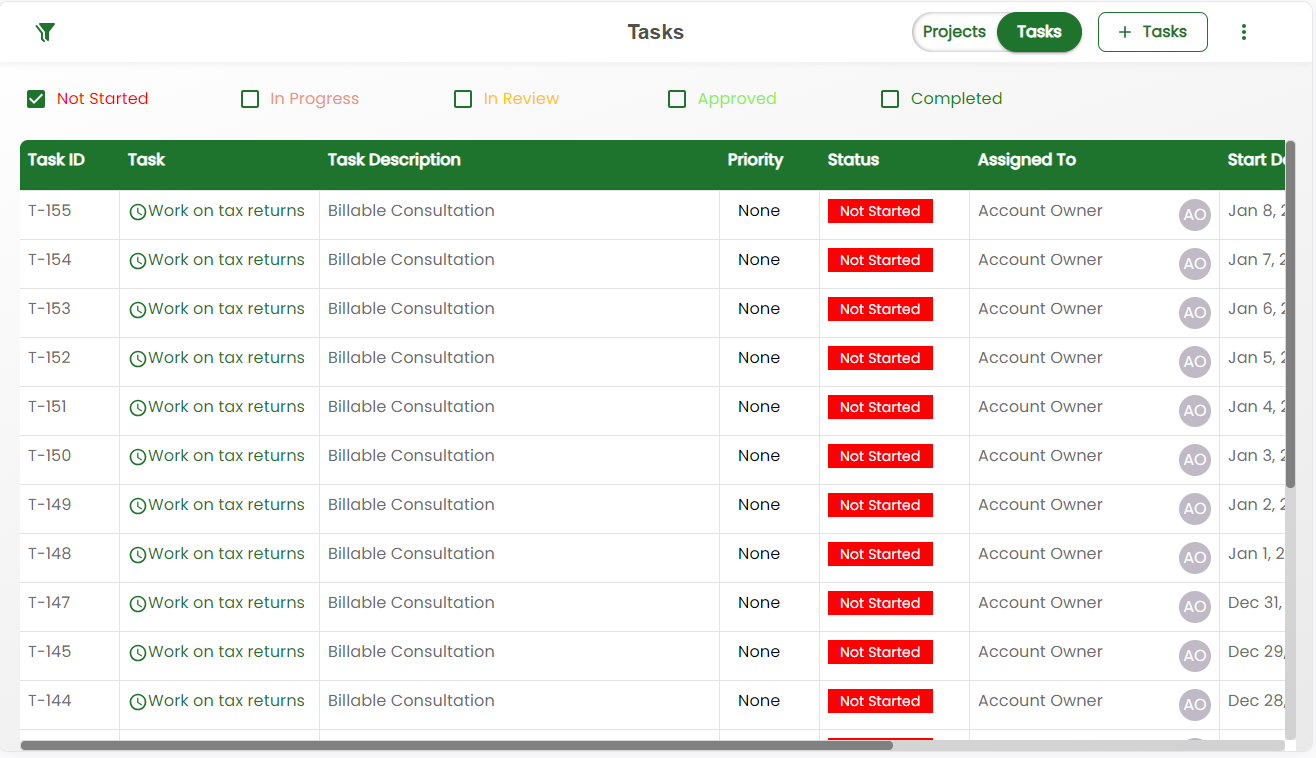
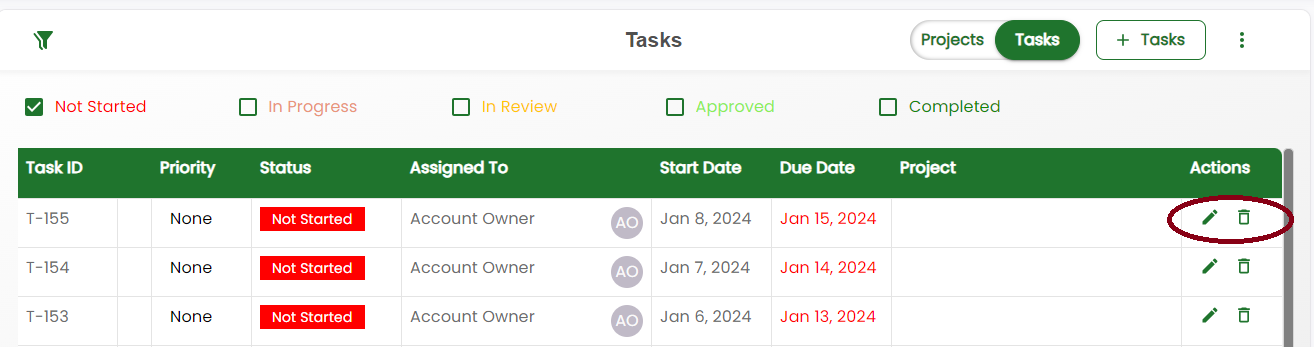
List View
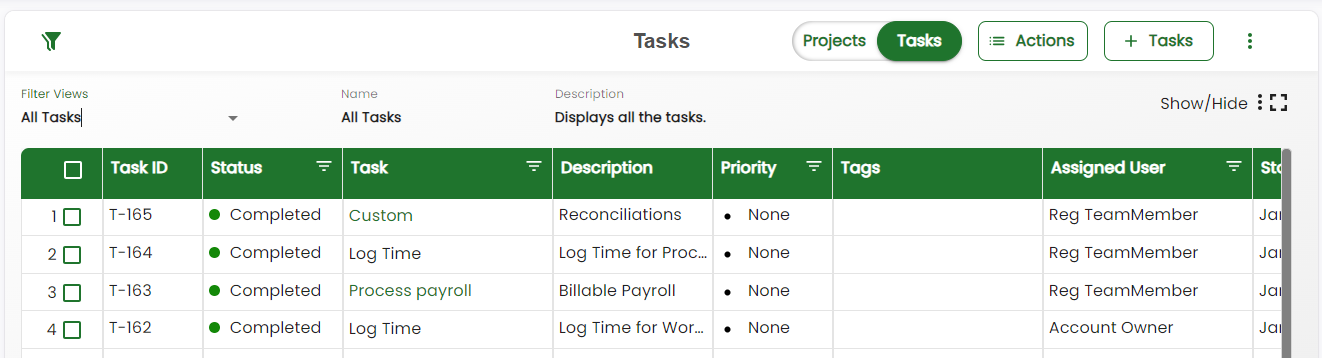
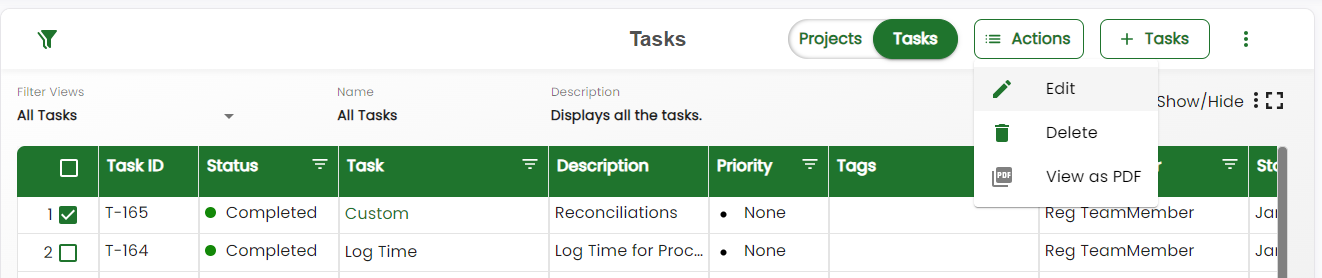
Spreadsheet View
You can edit or delete a task by clicking the edit (pencil icon) or delete (trash icon) button in both the Placard and List View.
Placard View
List View
You can also edit or delete a task from the Spreadsheet View by checking the box for the task in the first column and then going to the 'Actions' menu and choosing 'Edit' or 'Delete'.
Spreadsheet View
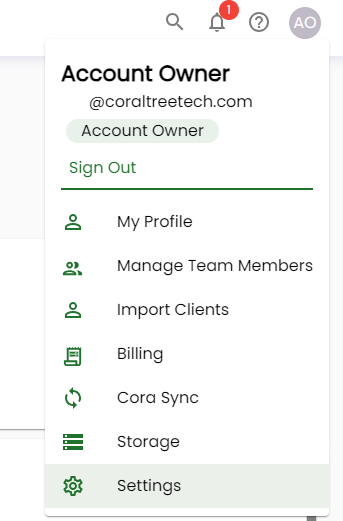
You can create new Task types to be selected from when creating tasks to better suit the needs of your particular firm.
First, open your Basil account dropdown menu and select ‘Settings’.
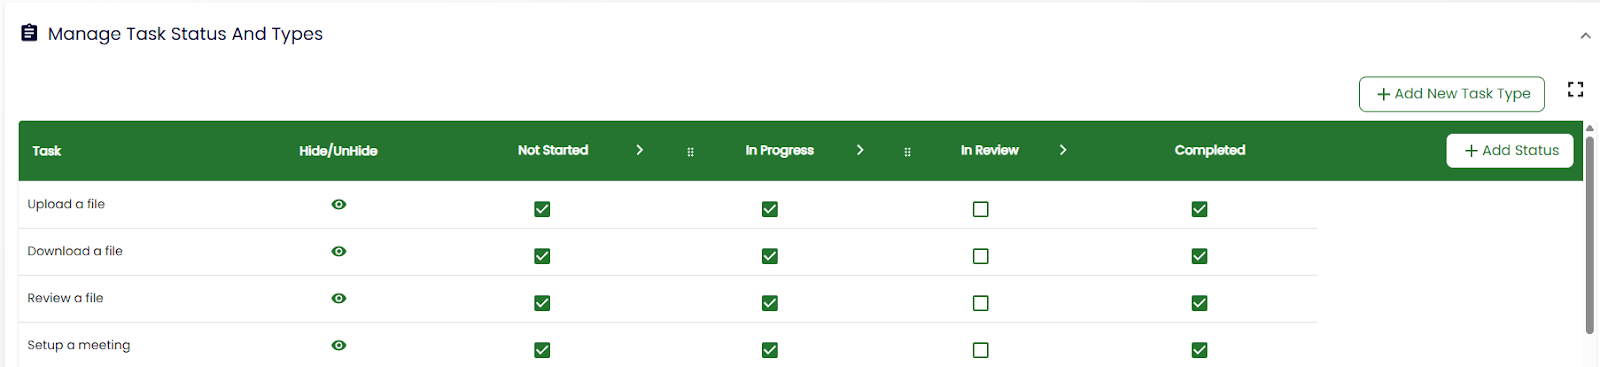
From the Settings page, expand the 'Manage Task Statuses and Types' menu and select ‘+ Add New Task Type’.
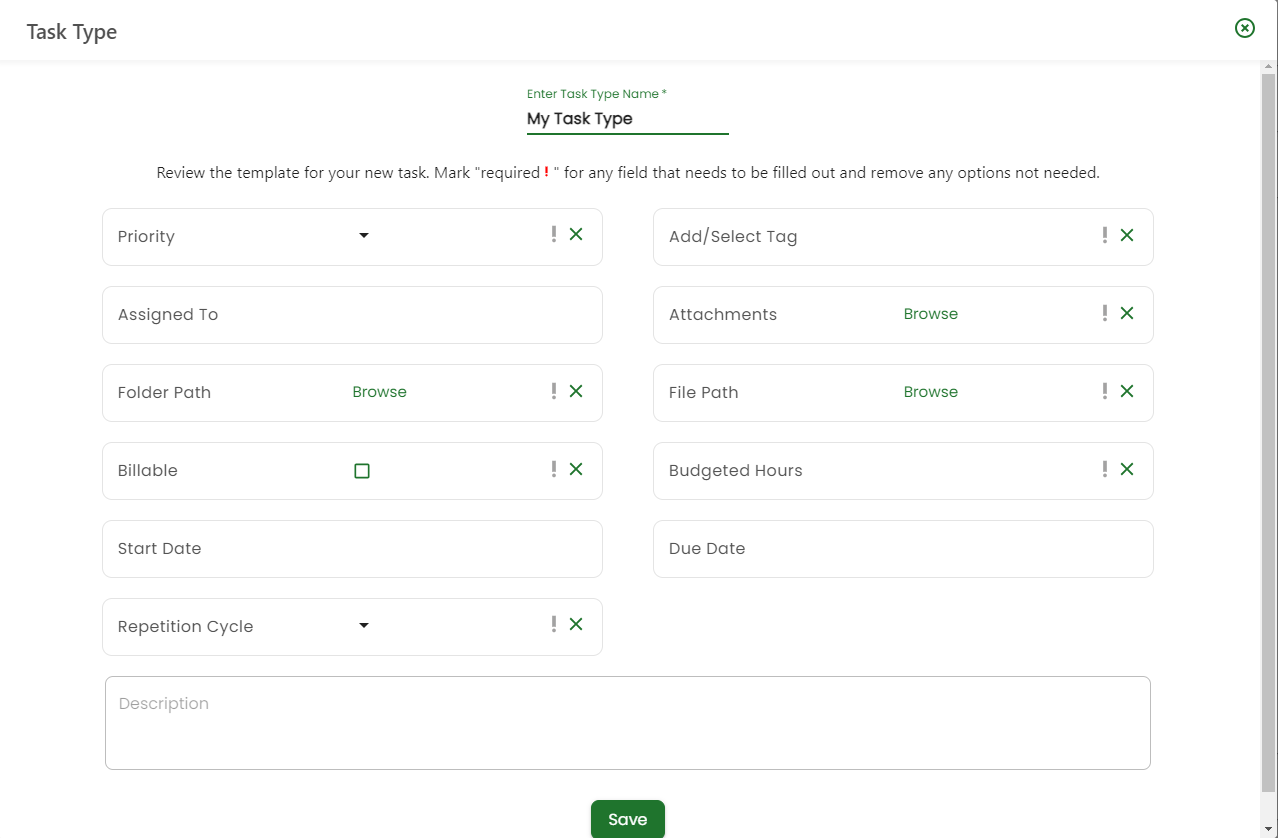
In the pop-up window, type the name of your new type of task. You can also select the gray exclamation '!' mark on each of the task’s subfields to make them required fields that will need to be filled out when creating a new task of this type. Click ‘Save’ when you are finished.
You’ll be brought back to the 'Manage Task Status and Types' screen. Here you can scroll to the bottom of the list to see your new Task type. You can click the eye icon to hide this task or any others from the list of selectable tasks when creating a new task. You may also click on the minus (-) symbol to delete the custom Task type from the list entirely. Use the checkboxes in each Task Status column to determine if you need to use the Status for the given Task type.

To start working with this new Task type you can now go back to the '+ Tasks' screen from the 'Tasks' tab and you will now see your custom Task type listed with the other available options.