![logo.png]](https://kb.coraltreetech.com/hs-fs/hubfs/CoralTree/logos/logo.png?height=23&name=logo.png)

If you currently are a Basil Advanced or Basil Pay user or are interested in their features, you may refer to our Support Portal.
Welcome to Basil Simple! We designed this version of Basil to give you the essential practice management tools you need to stay organized, collaborate securely, and get documents signed, all at a price that fits your growing firm. This guide will go into detail for each specified function below.
Getting Started:
- Clients
- Requesting Files to be Uploaded
- Sending Files to be Downloaded
- Tasks
- Payments
- Forms
Additional Help:
- Working with Basil as a Client User
Signing Up
To set up your Basil account, follow the steps below:
1. Go to our signup page (https://basil.coraltreetech.com/signup) and fill out the fields on the first page.
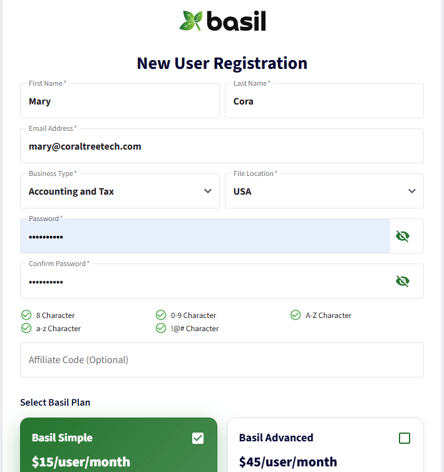
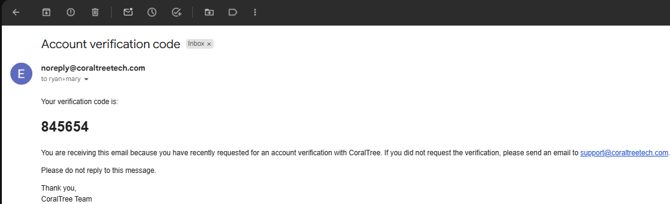
2. Basil will send you an email from noreply@coraltreetech.com with a verification code. Go to your email inbox to retrieve the code, then enter the code in the available text box.
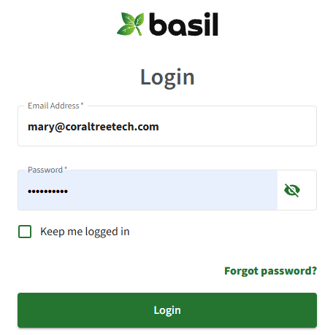
3. The page will refresh after you enter the verification code and prompt you to log in. Log in with the email and password you just created.
4. Read and accept the User Agreement. On the next screen enter your additional account information.
5. Your Basil account has now been created and you’ll be taken to the Basil Home screen.
Team Members
Team Member accounts are for users who are employees or associates of the Account Owner’s Firm and require access to any or all of the following:
- A specific Client’s External folders
- All Client folders
- The Firm’s own internal folders
Team Members are billable users just like the Account Owner. The Account Owner will be billed for themselves and each Team Member that is added to their account. Team Members are initially added by the Account Owner and can also be added by a Team Member with the Admin role by default.
1. You can add Team Members by clicking the ‘People’ tab at the top of Basil.
2. Then select the ‘Team Members’ sub tab.
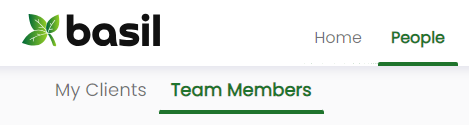
3. You should now see a screen displaying your Team Members.
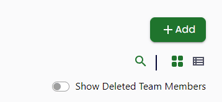
4. To the top right will be a ‘+ Add’ button, click this to add a new Team Member.
5. You can add users by entering their email address on the window that appears.
6. Select the role they should be given from the drop-down list (see permissions by Role below).
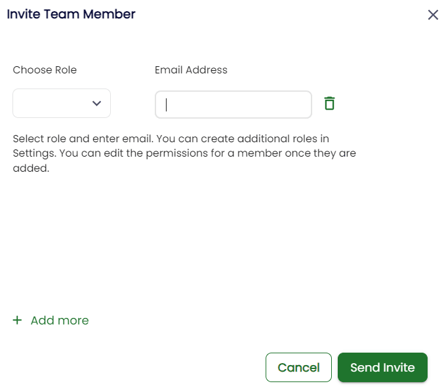
7. When you’re done adding the information for each Team Member, click ‘Send Invite’. Basil will send an email to the invited users asking them to join Basil and set up their account(s).
Team Member Permissions
Admin Team Members, by default, have most of the same permissions as the Account Owner, including access to all Clients and all ‘My Firm’ folders and documents. They can add/delete clients and all users with the exception of the Account Owner.
Clients
Account Owners and Admin Team Members can set up working spaces in Basil to collaborate with their Clients. These working spaces are called Clients in Basil. Each Client can have up to one contact added and invited so that they can sign up and interact with Basil at any time.
Adding a Client
1. Click the People tab at the top, then the ‘My Clients’ subtab, click ‘+ Add’ at the top-right.
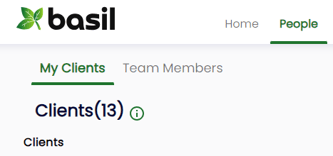

2. You’ll be presented with the Add New Client window.
- The Client Name is required.
- You may now choose to add a Primary User, this user will have access to the Client and has permission to view and upload files. A Primary User is usually the Client Owner or Administrator. If you choose to add a Primary User, you may send the invite immediately by checking the 'Send Invite' box or wait and invite later.
- Click ‘Add’ to create your new Client. You may now proceed to add files and Tasks for the Client.
Folders and Files
Folders and Files can be created and uploaded to four main locations on Basil for sharing and collaboration. These locations include:
- Inside the folder of each Client
- Inside any folder created at the ‘My Firm’ folder level
- Inside any folder that is nested in any of the previously mentioned folders
Creating a New Folder
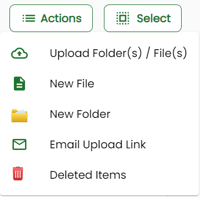
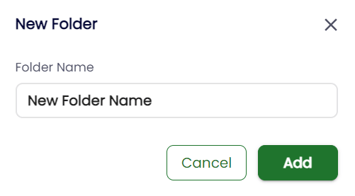
Once inside any of the locations above you can start creating new folders to organize your client files. To do so, click on the ‘Actions’ button in the top right. A drop-down menu will appear where you can select ‘New Folder’. A pop-up window will appear allowing you to type a name for this new folder. Enter the name you desire and then click ‘Add’. The pop-up will disappear and you will see your newly created folder on the screen.
Creating a New File
Basil gives you the ability to create and edit documents directly in the cloud from your web browser in multiple formats.
- Create: Word document (.docx), Excel spreadsheet (.xlsx), and PowerPoint presentation (.pptx)
- Edit: Word document (.docx, .doc), Excel spreadsheet (.xlsx, .xls, .csv), and PowerPoint presentation (.pptx)
To create a new file in Basil with the document editor:
1. Navigate inside the folder where you would like the document to reside.
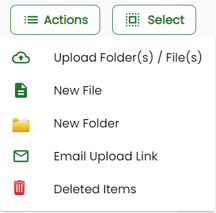
2. Click the ‘Actions’ button at the top right and select ‘New File’ from the drop-down menu.
3. A pop-up window will appear asking you for key information about this new file.
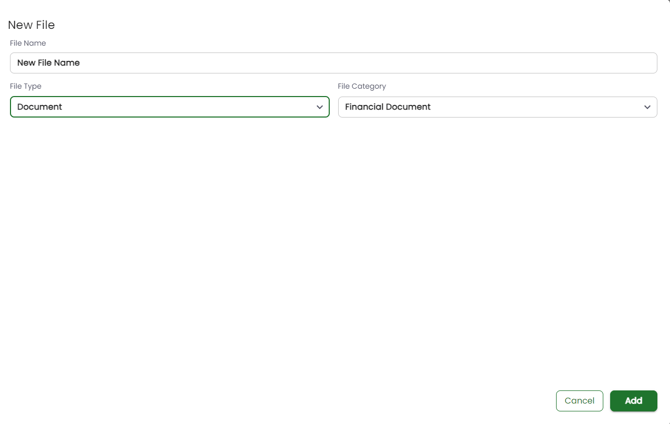
- Enter the name of this new file.
- Choose the type of file: Word document (.docx), Excel spreadsheet (.xlsx), and PowerPoint presentation (.pptx)
- Choose a file category if you wish to categorize the file. Document categories help identify a document without having to open it.
4. When finished, click the ‘Add’ button in the lower right corner and you will be taken to the document editor. Make sure to ‘SAVE’ the document at the top right before closing with the ‘Close File’ button at the top left.
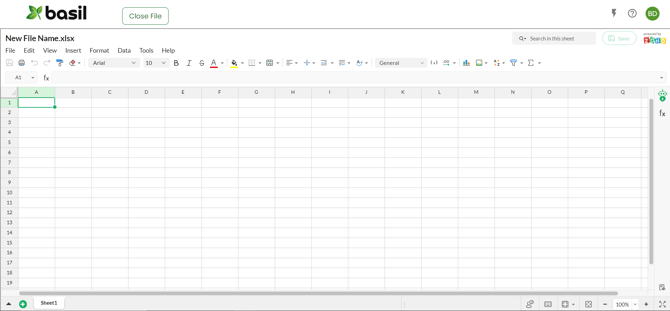
*The document editor (powered by Zoho) allows you to create and edit documents in the cloud from any supported browser. This editor has many of the same features that you come to expect when working with a program such as Microsoft Word or Excel but it is all in the cloud. Not all native functions of the Zoho editor and Microsoft Office products are compatible with each other, such as checkboxes and Zoho picklists. For full Microsoft Word and Excel functionality, we recommend downloading the file from Basil, editing it externally, and then re-importing it back into Basil.
Uploading Files
You most likely already have files located on your local hard drive that you’ve created while working with your clients and internal staff. You can upload documents from your PC to Basil provided they are a supported file type. To upload a file:
1. Navigate inside the folder where you would like the file to reside.
2. Click the ‘Actions’ button at the top right and select ‘Upload Folder(s) / File(s)’ from the drop-down menu.
3.A pop-up window will appear, make sure you are selected to the ‘Upload Files’ tab at the top. 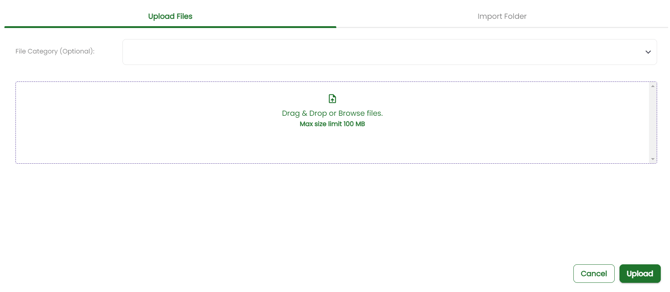
4. You can drag and drop your files to the area outlined by the dotted lines or you can click on the text inside the box and it will open a File Explorer window for you to navigate and select the files you wish to upload. If all of the files you’re uploading are of the same type (like W-2s), you can use the ‘File Category’ drop-down above the dotted box to categorize the files before the upload.
5. Next, click ‘Upload’ in the lower right corner and your files will be copied from your local hard drive and into Basil.
Requesting Files to be Uploaded
You can use the ‘Email Upload Link’ tool to request files from the client. To request a file upload:
1. Navigate to the Client’s External folder where you would like the individual to upload the file(s).
2. Click the ‘Actions’ button at the top right and select ‘Email Upload Link’ from the drop-down menu.
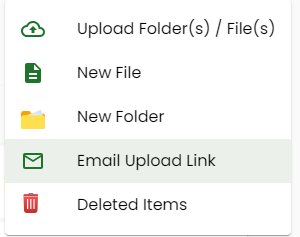
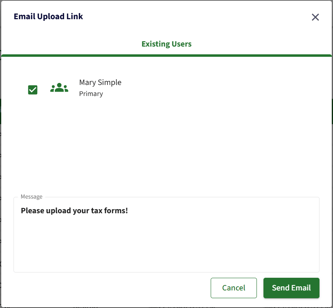
3. Select your client if they have been invited and created their account. Optionally, write a message, then click ‘Send Email’.
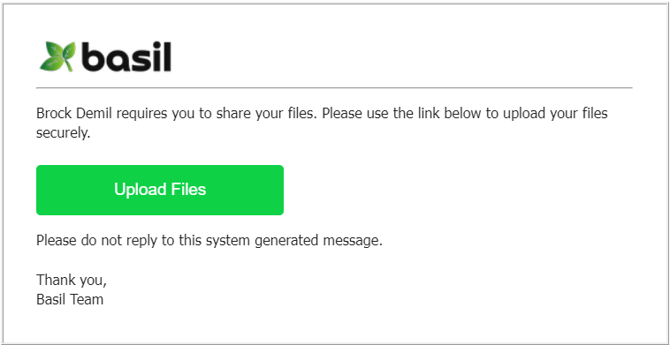
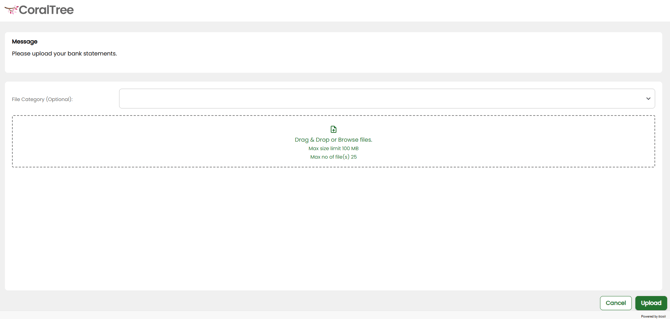
4. The individual the link was sent to will receive an email and will need to click the ‘Upload Files’ button. They will be brought to the upload files popup window where they can drag and drop files, or browse and select files on their PC. Upload links are valid for seven days.
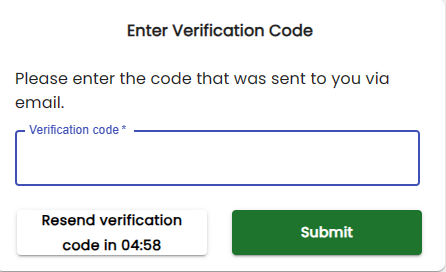
The user will also need to fill out a verification code before being able to upload their files to the platform. This code will be emailed to them separately.
The recipient will not be able to use the same upload link again after uploading files.
Sending Files to be Downloaded
When you need to give someone access to a file in the Basil platform, you can do so with a download link. Similar to the upload link, this will be a one-time use link that allows them to download the specific file. The link will expire after seven days if not acted on.
Sending a download link for one file:
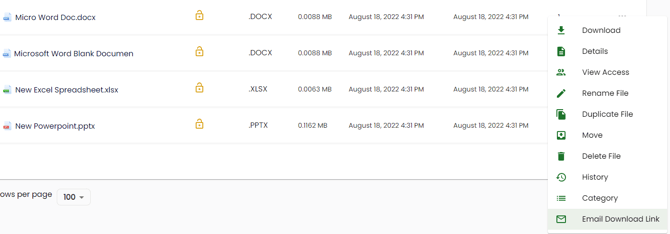
First, go to the location of the file that the user needs to download and click on the file’s 3-dot menu to the right.
From the menu, select ‘Email Download Link’.
A contact form window will open. You can select an existing contact or create a new contact. If there is more than one person who needs to submit a file to this same folder, you can click on the ‘+ Add More’ option and type in the information of additional people. You can also include a message to provide additional information or instructions when viewing the page to upload files.
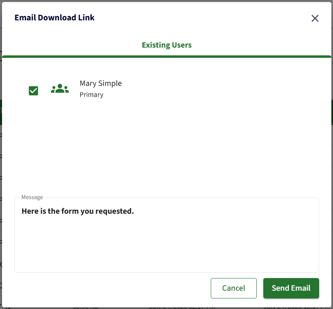
Once you click on ‘Send Email’, this will send the person a one-time use link to the designated email address.
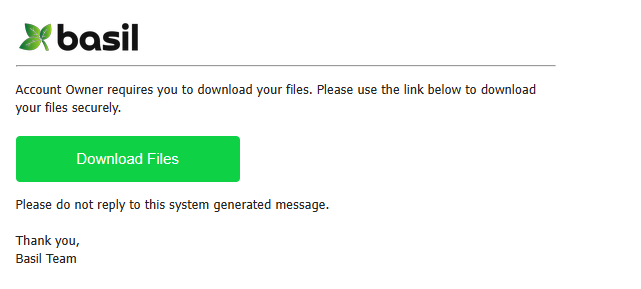
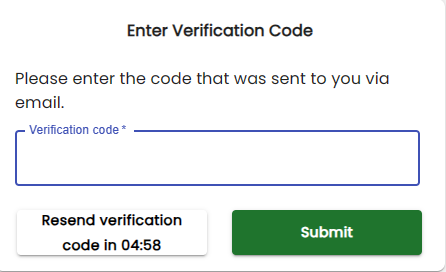
The user will also need to fill out a verification code before being able to download their files. This code will be emailed to them separately.
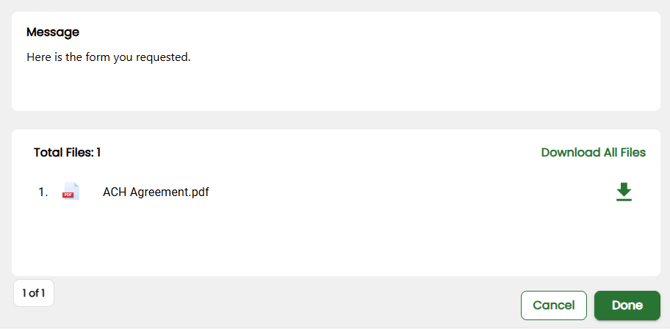
The recipient will not be able to use the same download link again after downloading.
Sending a download link for multiple files:
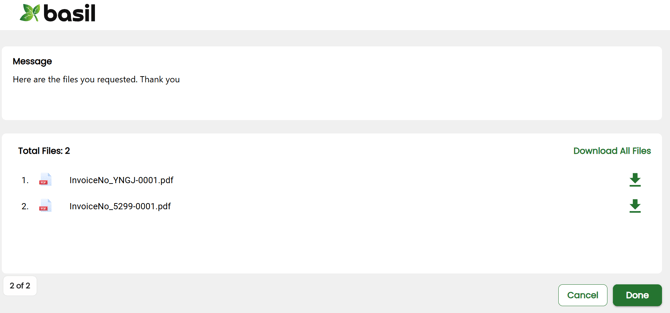
You can also send multiple files at once to be downloaded using the checkboxes on the left and then clicking the envelope icon on the toolbar that shows up on the top-right.
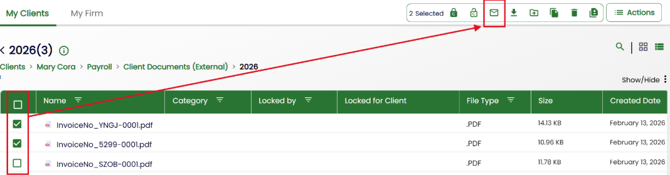
The user will be able to download them one-by-one using the down arrow icon or ‘Download All Files’ button on the right to download all individual files at once.
The recipient will not be able to use the same download link again after downloading.
Signatures
Obtaining an eSignature in Basil is simple. First, you will need to upload a PDF document to the appropriate Client in Basil.
1. Click on the 'Signatures' tab at the top of Basil and then select the '+Add' option to the top-right.
2. In the pop-up window you'll be presented with the option to add a new PDF file to use for eSignature. Make sure to select the correct Client so Basil knows where to store the PDF during document preparation. You may also categorize the file during this upload process as well. You can add the file by dragging and dropping the file into the indicated box in the center or you can click the center box to browse and select the file from your computer. Once these are filled out and you’re ready to proceed, click 'Upload'. For best results, ensure your PDF is one of the following page sizes: Letter, Legal, A3, A4. 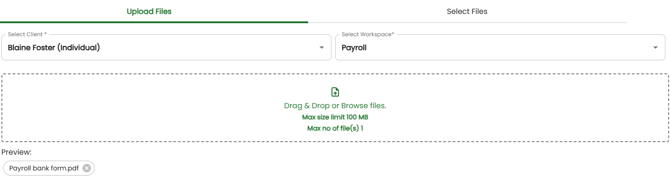
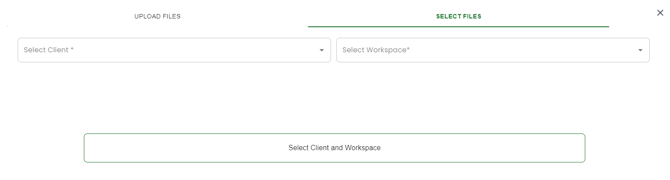
- If the file you wish to use for eSignature is already on Basil, you can use the 'Select Files' tab instead and select the file from the correct Client in Basil.
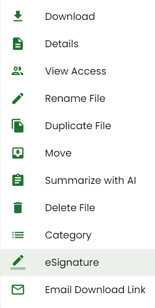
- Alternatively, you can go to the 'Files' tab and navigate to the client or folder where you'd like to have the PDF reside and use the 'Actions' menu to upload the new PDF to that exact location. Once a document is added, you can then click the three-dot menu for the PDF document and select 'eSignature'.
3. Enter the email addresses of users who need to sign the document. Check the ‘Include My Signature’ box if you need to sign the document. You can rearrange the order by dragging the emails up or down using the icons on the right.
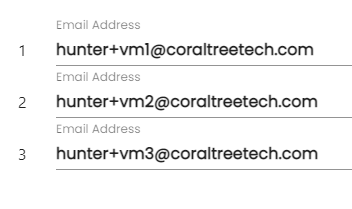
4. Check the ‘Enforce signature order’ box if the users need to sign one after another. If enforced, the second signer will not receive a notification or be able to sign the document until the first user signs the document and so on.
5. Once all signer email addresses have been added, click the ‘Prepare Document’ button.
6. The document will be displayed and there will be a panel with multiple eSignature fields on the right side of the screen.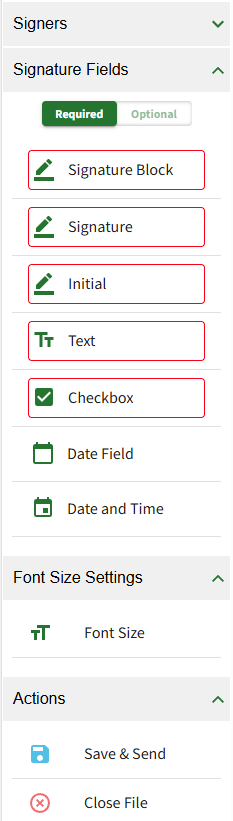
7. To prepare the document, drag and drop eSignature fields like a Signature line, Initials line, Date field, Text Box, or Checkbox over the document.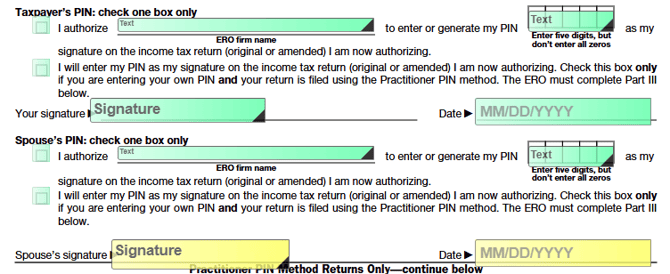
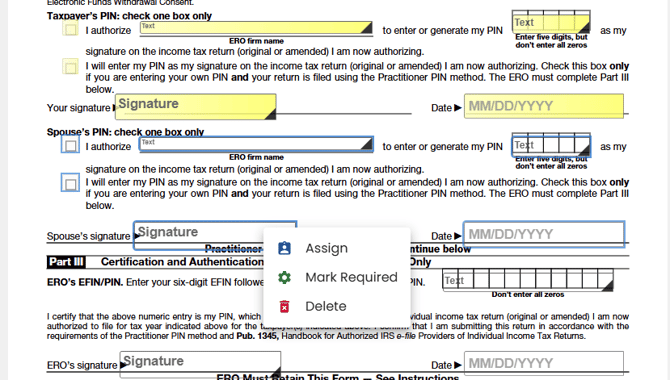
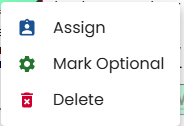
8. Assign each field to a signer by right-clicking on the field.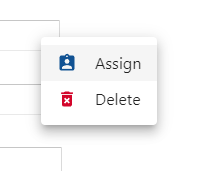
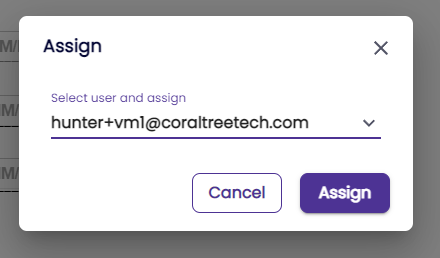
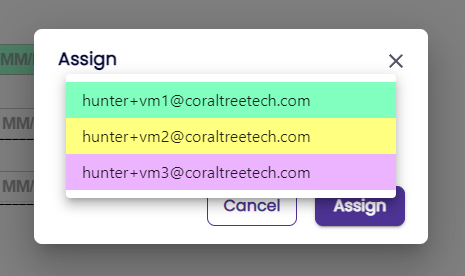
You can easily assign multiple fields to one signer at once by first left-clicking a series of unassigned fields, then right-clicking one of them and selecting ‘Assign’.
The below example shows a group of unassigned fields (in the middle section) that will be assigned to a spouse. Notice the thicker dark blue outline on the unassigned fields that have been selected.
9. To mark a field as required or optional, you can use one of two methods:
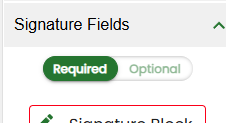
- Ensure the desired attribute is selected with the ‘(Required | Optional)’ toggle in the ‘Signature Fields’ section on the right, then drag and drop the field onto the document…
- Or right-click the field and select either ‘Mark Optional’ or ‘Mark Required’
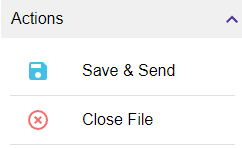
10. When you are finished, click the ‘Save & Send’ button to send an email to each selected user which will include a link to access and sign the document.
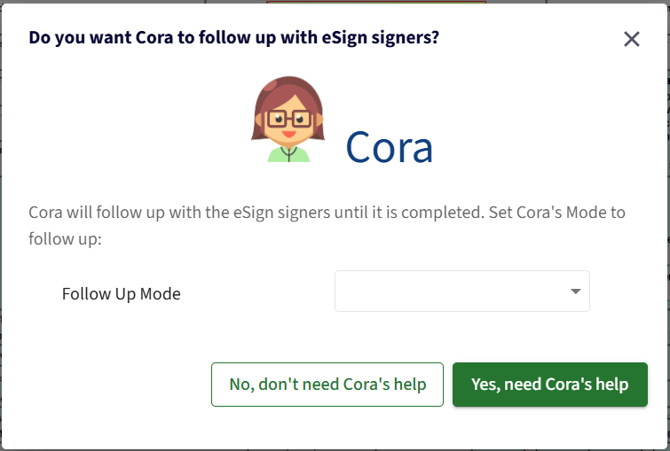
11. You will be prompted to enable Cora Assistant who will help remind the signers until they complete the signature. Cora can be set to an ‘Easygoing’, ‘Regular’, ‘Critical’, or a Custom mode. Custom follow-up modes can also be configured in the Account Owner’s Settings > AI Settings > Cora Assistant Configuration section.
12. Once all signers have finished signing, they will receive an ‘eSignature Completed’ email with a link to download. It can also be viewed and downloaded from the Signatures tab of Basil.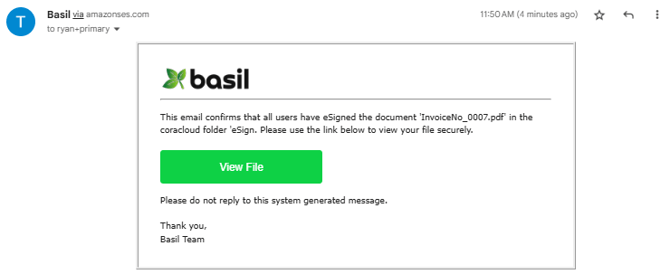
Automated Detection of Elements
When adding signature fields to a document, you can simplify the process by having Basil parse through and automatically detect potential fields.
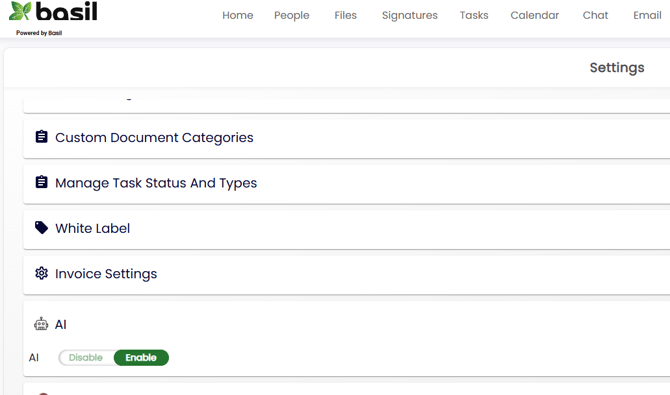
First, reach out to Basil Support to have this feature enabled. Second, click your icon on the top-right of Basil and go to Settings. Under the ‘AI’ section, click ‘Enable’.
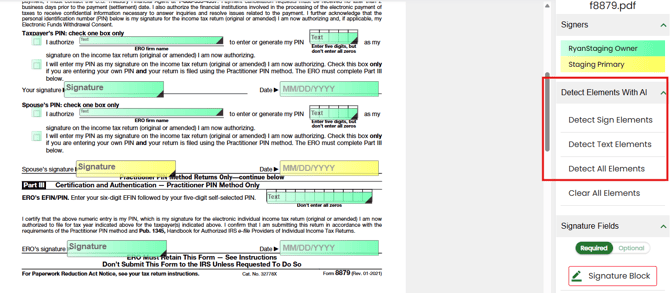
Initiate an eSignature on a PDF file in Basil and select ‘Prepare Document’. On the screen where you drag and drop fields, you should see a ‘Detect Elements with AI’ section. Click any of the Detect Elements buttons and you will see new fields being added where Basil best sees them fit. If any of the fields are misplaced, you can right-click and delete them or click and drag to reposition. This function is available for the ‘Prepare Document’ option when initiating an eSignature (and is currently not available for Creating/Applying Templates).
Using this AI function will use a certain amount of AI Credits. Please refer to our article on AI Copilot for more information.
Tasks
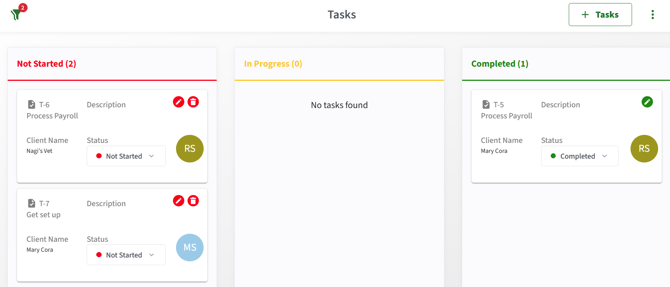
You can create Tasks in Basil and assign them to yourself as the Account Owner, Team Members, or Primary Users, for any work that needs to be performed. New tasks can be created from each of the twoTask views (Placard and List).
Creating a Task
1. Click on the 'Tasks' tab at the top of Basil. On the top-right, click on '+Tasks'.
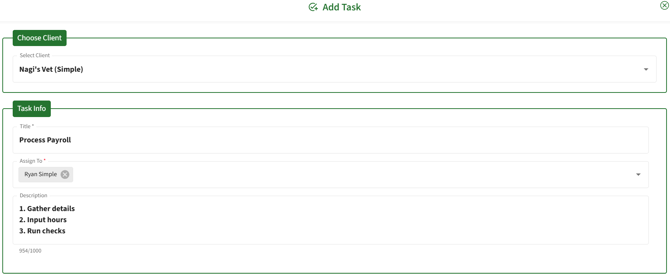
2. This will open the Create a Task window. First, choose a Client, a Task Title, and assign it to an assignee (or leave it unassigned for others to grab). A description can be added if desired.
Working on a Task
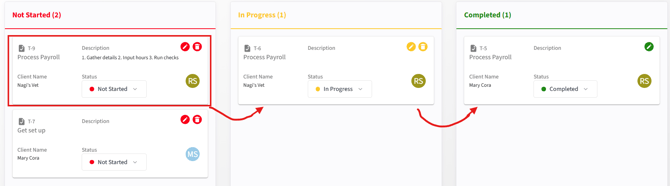
There are several ways to work on a Task. The easiest is to drag and drop the tile from one column to another. You can also use the Status dropdown on the tile to set the designated status.
Basil Simple includes the ability to send invoices to clients and receive payment via a 3rd party integration with Stripe. Please note that Basil does not have the ability to collect payment from clients directly, and you will need a Stripe account to be integrated with Basil for payment collection. You can sign up for a free Stripe account at the following link: https://dashboard.stripe.com/register
To link the Stripe account to Basil, click on your initials in the upper right of Basil and choose ‘Settings’.
From the Settings menu, choose ‘Invoice Settings’ and then enable Stripe Invoicing. If you do not see this option, please contact Basil Support to have it enabled.
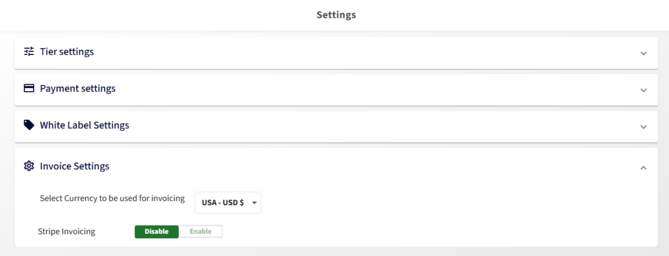
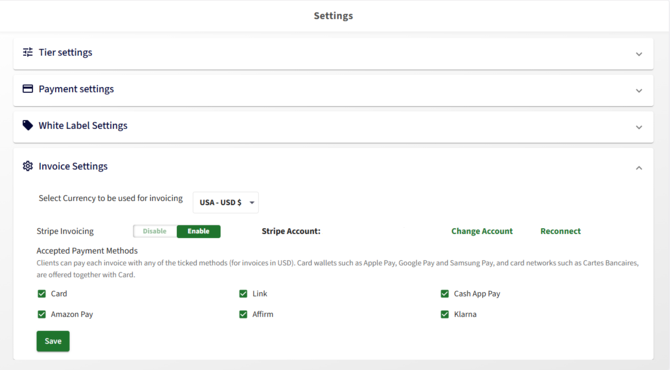
You’ll then be redirected to the Stripe Login page to connect your two accounts. Once the two accounts are successfully connected, you’ll be brought back to Basil where you can change the connected account, if necessary, and also choose what payment method will be allowed via Stripe.
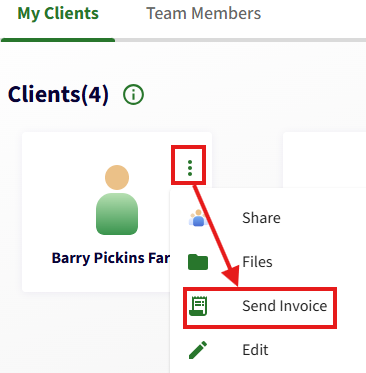
Now that the payment processor is connected, go to the ‘People’ tab of Basil.
Click the 3-dot ‘Actions’ button to the right of the Client you’d like to send an invoice for and choose the ‘Send Invoice’ option from the drop-down menu.
On the New Pay Invoice screen, you can set the following information:
- Invoice Date (defaults to the day you create the invoice)
- Due date (defaults to the same day the invoice is created)
- Repetition cycle: You can set whether this invoice and all the information you enter should be sent to the client on a regular basis
- Amount: Total amount for the invoice
- Description: Details on what this invoice is for
- Notes: Any additional information you wish to give the client
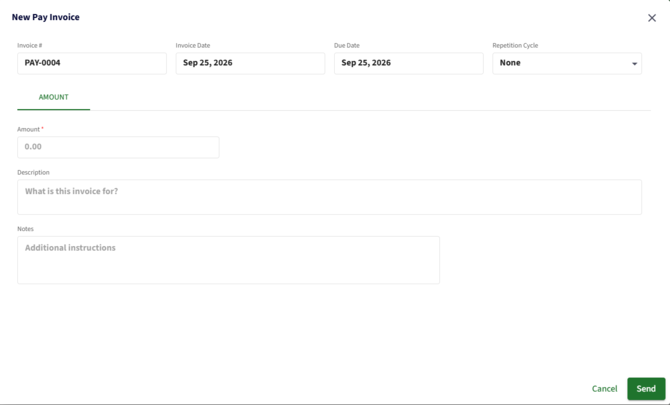
You can also set up the invoices to include predefined line items. You can configure these in ‘Payment Settings’ in your Account Menu, and this is discussed more below.
Once you are happy with the details of the invoice, you can click on ‘Send’ in the lower right. This will send the invoice to the client’s email address and contain a link so that they can pay via Stripe.
After the invoice has been sent, you can view all of your invoices from the ‘Payments’ tab.

Here you can monitor all invoice statuses. When a client makes a payment through the link, Stripe will automatically update the invoice status on this page.
You also have additional options in the ‘Actions’ column where you can:
- Edit - Edits the existing invoice
- Copy - Makes a duplicate invoice where you can choose new fields such as Client and dates
- View - Shows a preview of the invoice where you can print or download the invoice as a PDF document
- Void - Deletes the invoice
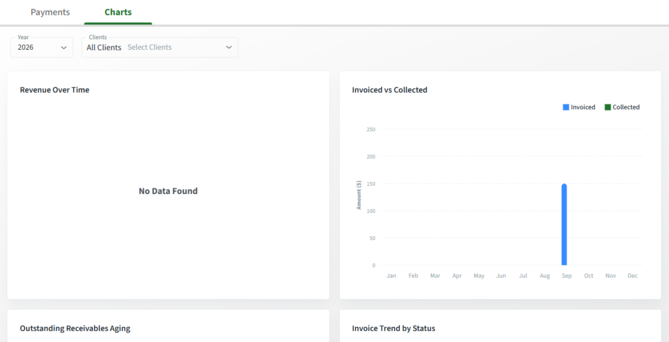
In the upper-left of the screen, you can toggle between your Payments menu and the Payment Charts screen. The Charts screen will give you a graphical view of all invoices and payments made so that you have a better understanding of payment statuses and revenue generated.
Configuring Payment Reminders
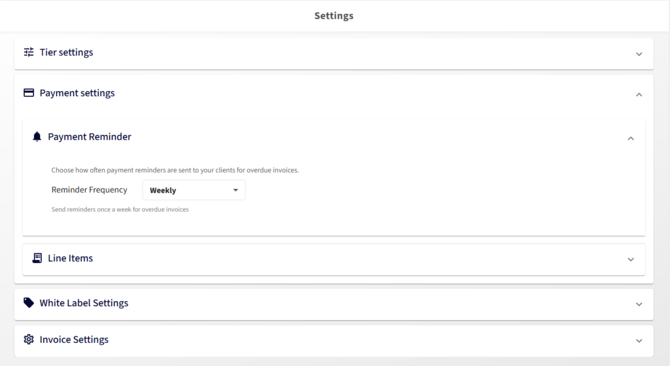
When you send an invoice to a client, they will get an initial email requesting them to make payment. The client may miss the message or forget about the email, which is why Basil has the option to configure reminder emails so the client will keep getting notification emails until payment is made.
You can set the interval for how often these reminders will be sent by going to the ‘Settings’ page under your Account Menu on the top-right of Basil and choosing ‘Payment Reminder’. You can set the interval for these reminders for ‘Daily’, ‘Weekly’, or a ‘Custom’ interval of your choosing based on certain days of the month.
Configuring Line Items
Predefined line items can be enabled and configured under Payment Settings for your invoices as well. Once you enable Line Items, you’ll have to enter each line item that you’d like to use here on the settings screen.
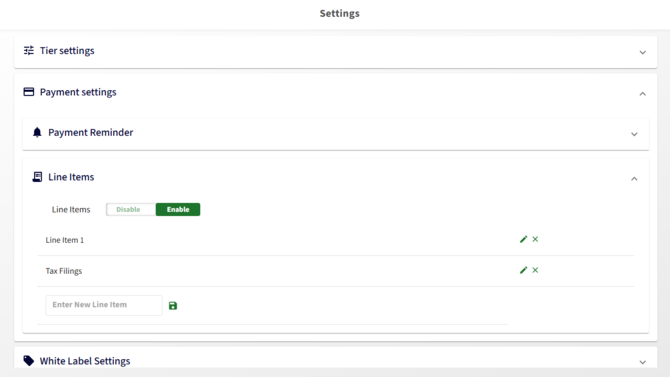
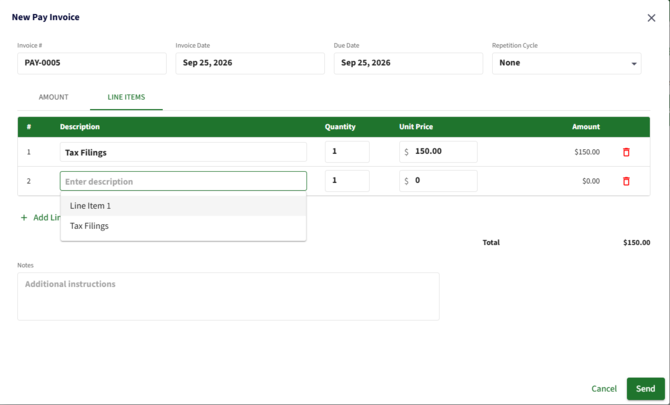
Once entered, Line Items will appear as a separate section in the invoice creation screen and will let you create the invoice differently than entering the total amount. You can choose the line item as a description, set the quantity, and set the unit price of each. All line-item entries will be automatically totaled in the lower right:
Configuring Invoice Settings
Additional settings related to invoices can be found by clicking your icon on the top-right, going to Settings, and expanding the Invoice Settings item.
- Select Currency to be used for invoicing - Selects which currency will be shown on Basil.
- Stripe Invoicing - Allows you to enable, disable, or change the Stripe account linked to your Basil account.
- Accepted Payment Methods - Selects which payment method can be used when the client clicks the ‘Pay invoice’ link from the email they receive.
🔼Back To Top
Profile Settings
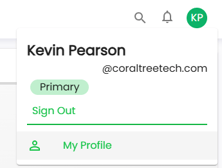
You can update your Basil profile information at any time. To do so, click your initials in the top-right corner of the screen and select 'My Profile'.
Once on the profile page, you can change or update any information marked with a 'Pencil' icon (edit icon). These include:
- First Name
- Last Name
- Phone Number
- Mobile Number
- Password
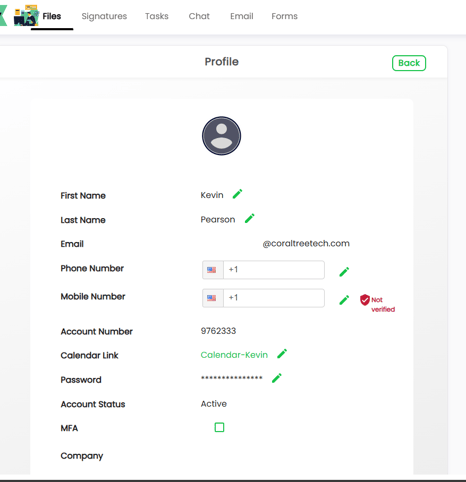
If you enter and verify your mobile number, you may receive automated text messages from your Basil Account Owner (typically your Accountant or Bookkeeper) for reminders about eSignatures or Tasks. Click the ‘Not verified’ icon to the right of the Mobile Number field to begin the verification process.
Other options on this page include the ability to enable MFA (Multi-Factor Authentication) and Enable Menu Icons. With MFA enabled, you will need to input a verification code provided either by text message or authenticator app each time you log in. The 'Enable Menu Icons' option replaces the tab text labels (like 'Files', 'Signatures', 'Tasks') with icons at the top of the screen. This is recommended for users with smaller screens or lower resolutions.
Switching to Basil Advanced
If you are interested in upgrading your account for more features, the Account Owner can go to Settings > Tier settings.
When trying to switch from Advanced to Simple, you may get an alert instructing to delete items related to Advanced features.