![logo.png]](https://kb.coraltreetech.com/hs-fs/hubfs/CoralTree/logos/logo.png?height=23&name=logo.png)

If you currently are a Basil Advanced or Basil Simple user or are interested in their features, you may refer to our Support Portal.
Basil Pay
Basil Pay is a free version of the Basil platform that allows users to send invoices to clients and receive payment via a 3rd party integration with Stripe. Basil Pay only includes the ability to send an invoice to clients and does not have any of the features contained in the pay tiers of Basil Simple or Advanced, such as client portals, team member access, tasks, or forms.
Please note that Basil does not have the ability to collect payment from clients directly, and you will need a Stripe account to be integrated with Basil for payment collection. You can sign up for a free Stripe account at the following link: https://dashboard.stripe.com/register
Signing up
To start using Basil Pay, you’ll first need to sign up for an account at https://basil.coraltreetech.com/signup
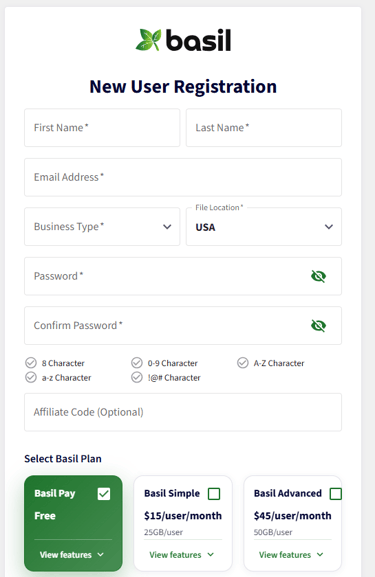
On the New User Registration page, you’ll want to select the ‘Basil Pay’ plan. If you’re interested in comparing the different versions of Basil, you can click on the “View Features” of each plan to see a side-by-side comparison.
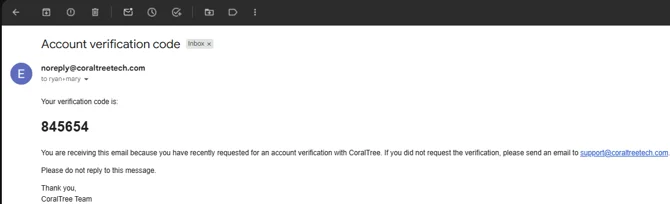
Basil will send you an email from noreply@coraltreetech.com with a verification code. Go to your email inbox to retrieve the code, then enter the code in the available text box.
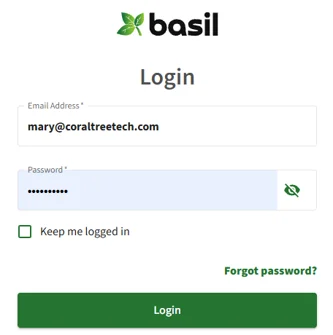
The page will refresh after you enter the verification code and prompt you to log in. Log in with the email and password you just created.
Read and accept the User Agreement. On the next screen, enter your additional account information.
Your Basil account has now been created, and you’ll be taken to the Basil People screen where you can manage your list of clients.
Using Basil Pay
There are two steps that need to be taken before you can send an invoice to a client for payment.
The first step is to connect your Stripe account. If you do not have one already, you can create one using the following link: https://dashboard.stripe.com/register.
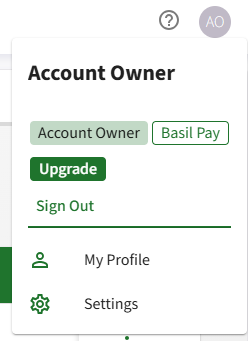
First, access your Account Menu by clicking on your initials in the upper right and choosing ‘Settings’.
From the Settings menu, choose ‘Invoice Settings’ and then enable Stripe Invoicing. If you do not see this option, please contact Basil Support to have it enabled.
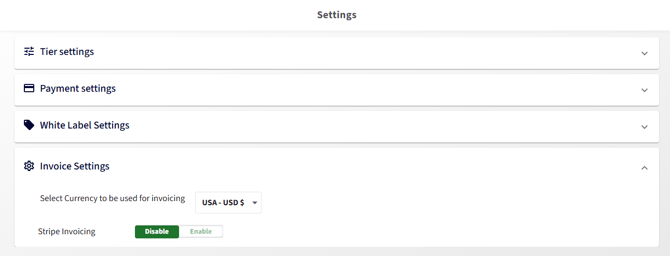
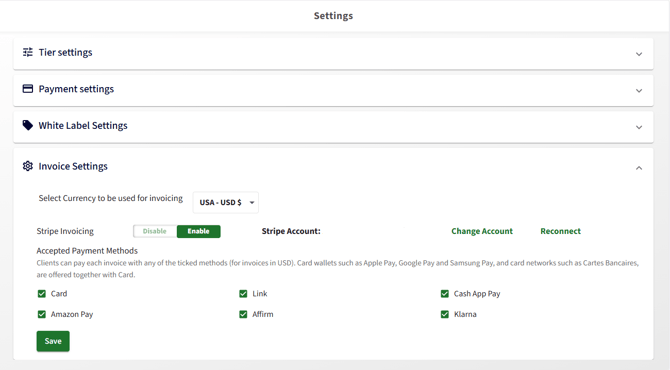
You’ll then be redirected to the Stripe Login page to connect your two accounts. Once the two accounts are successfully connected, you’ll be brought back to Basil where you can change the connected account, if necessary, and also choose what payment method will be allowed via Stripe.
Now that the payment processor is connected, you’ll need to add clients to our client list in order to send them an invoice. This is done from the ‘People’ tab of Basil.
Click on the ‘+Add’ button in the top right, and the Add Client window will appear.
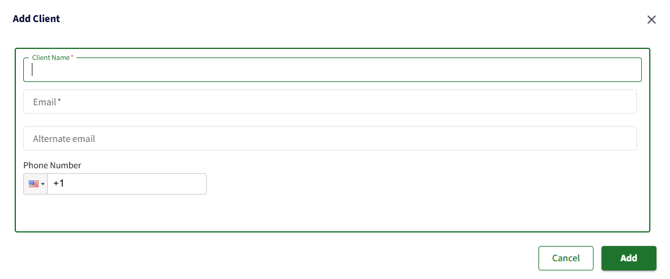
Enter the Client’s name and their email address, as these are required fields. Alternate email and Phone Number are completely optional. Click the ‘Add’ button in the lower right corner to save the client to your client list.
The Client now appears in your list of clients. If you ever need to remove the client from your list, update the client’s name, or update their email address, you can do so from the 3-dot menu across from their name in the ‘Actions’ column.
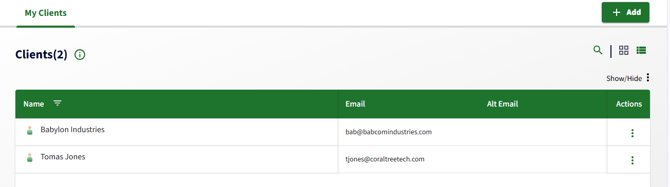
You can now begin to create a simple invoice to send to the client. Click the 3-dot ‘Actions’ menu across from their name and choose the ‘Send Invoice’ option from the drop-down menu.
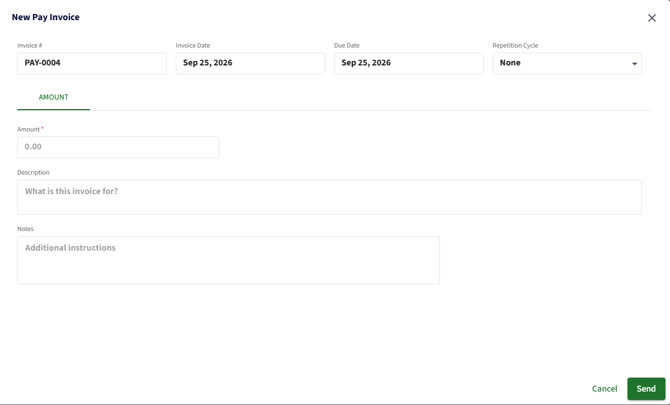
On the New Pay Invoice screen, you can set the following information:
- Invoice Date (defaults to the day you create the invoice)
- Due date (defaults to the same day the invoice is created)
- Repetition cycle: You can set whether this invoice and all the information you enter should be sent to the client on a regular basis
- Amount: Total amount for the invoice
- Description: Details on what this invoice is for
- Notes: Any additional information you wish to give the client
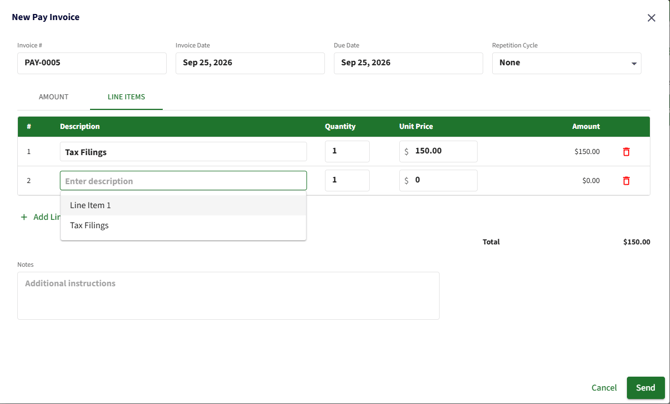
You can also set up the invoices to include predefined line items. You can configure these in ‘Payment Settings’ in your Account Menu, and this is discussed more below.
Once you are happy with the details of the invoice, you can click on ‘Send’ in the lower right. This will send the invoice to the client’s email address and contain a link so that they can pay via Stripe.
After the invoice has been sent, you can view all of your invoices from the ‘Payments’ tab.
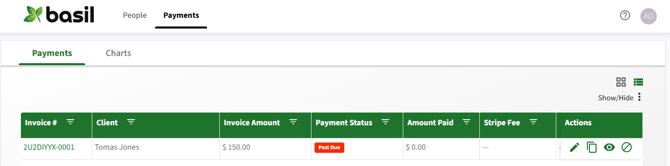
Here you can monitor all invoice statuses. When a client makes a payment through the link, Stripe will automatically update the invoice status on this page.
You also have additional options in the ‘Actions’ column where you can:
- Edit - Edits the existing invoice
- Copy - Makes a duplicate invoice where you can choose new fields such as Client and dates
- View - Shows a preview of the invoice where you can print or download the invoice as a PDF document
- Void - Deletes the invoice
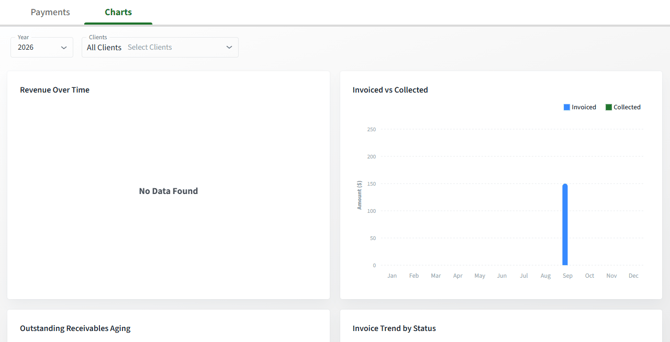
In the upper-left of the screen, you can toggle between your Payments menu and the Payment Charts screen. The Charts screen will give you a graphical view of all invoices and payments made so that you have a better understanding of payment statuses and revenue generated.
Payment Settings
Payment Reminders
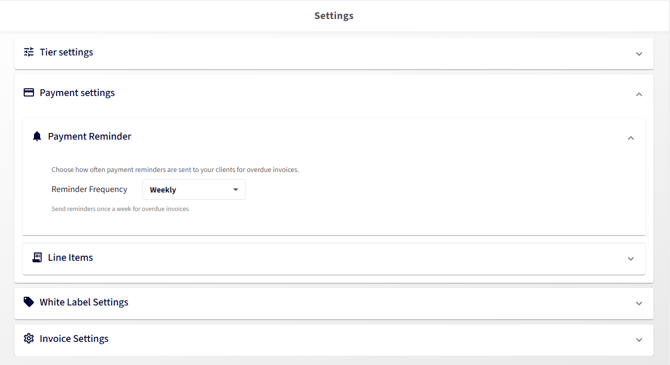
When you send an invoice to a client, they will get an initial email requesting them to make payment. The client may miss the message or forget about the email, which is why Basil Pay has the option to configure reminder emails so the client will keep getting notification emails until payment is made.
You can set the interval for how often these reminders will be sent by going to the ‘Settings’ page under your Account Menu and choosing ‘Payment Reminder’. You can set the interval for these reminders for ‘Daily’, ‘Weekly’, or a ‘Custom’ interval of your choosing based on certain days of the month.
Line Items
Predefined line items can be enabled and configured under Payment Settings for your invoices as well. Once you enable Line Items, you’ll have to enter each line item that you’d like to use here on the settings screen.
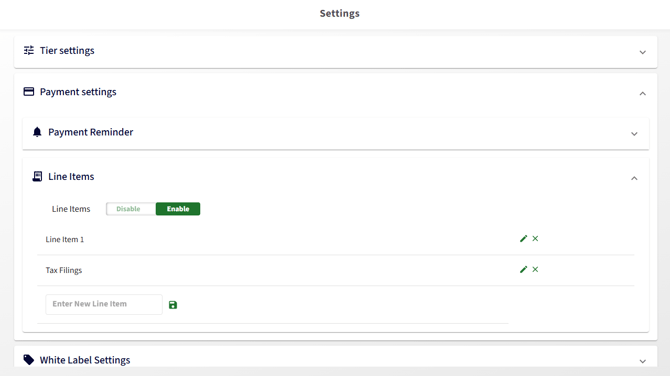
Once entered, Line Items will appear as a separate section in the invoice creation screen and will let you create the invoice differently than entering the total amount. You can choose the line item as a description, set the quantity, and set the unit price of each. All line-item entries will be automatically totalled in the lower right:
Whitelabeling
Basil gives you the ability to personalize the platform with your company's name, logo, and primary brand color so your clients can trust that emails and notifications from Basil are indeed coming from you. Please see our guide on Whitelabeling for more information
Invoice Settings
Additional settings related to invoices can be found by clicking your icon on the top-right, going to Settings, and expanding the Invoice Settings item.
- Select Currency to be used for invoicing - Selects which currency will be shown on Basil.
- Stripe Invoicing - Allows you to enable, disable, or change the Stripe account linked to your Basil account.
- Accepted Payment Methods - Selects which payment method can be used when the client clicks the ‘Pay invoice’ link from the email they receive.
Profile Settings
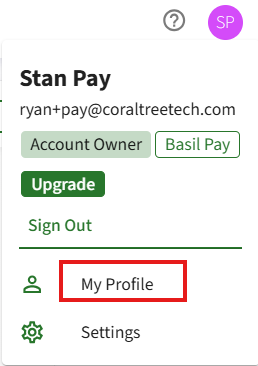
You can update your Basil profile information at any time. To do so, click your initials in the top-right corner of the screen and select 'My Profile'.
Once on the profile page, you can change or update any information marked with a 'Pencil' icon (edit icon). These include:
-
First Name
- Last Name
- Phone Number
- Mobile Number
- Password
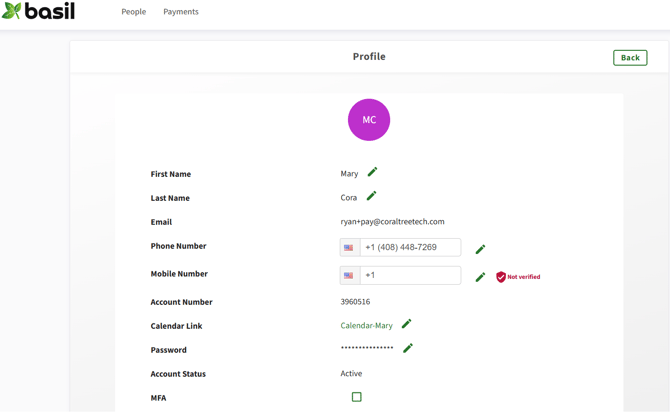
You can also enable MFA (Multi-Factor Authentication). To do so, you will need to input a verification code provided either by text message or authenticator app each time you log in.
The 'Enable Menu Icons' option at the bottom replaces the tab text labels (like 'People' and 'Payments') with icons at the top of the screen.
Upgrading
Basil Pay is the free tier of Basil designed primarily to provide a simple client list and the ability to send, track, and receive payments from invoices. To enhance the functionality of your Basil platform, you can upgrade at any time to our pay tiers for Basil Simple or Basil Advanced to gain access to all the features they contain.
To upgrade, simply click on your initials in the upper right corner to access your Account Menu and click the ‘Upgrade’ button.
Please note that once you upgrade to a higher version of Basil, you will not be able to downgrade back to Basil Pay.