
This article is intended for clients of existing Basil users. Continue reading for an overview on accessing Basil and utilizing its functions (such as File management and eSignatures) from the perspective of a client.
Registering for Basil
To access Basil, your Account Owner (typically your Accountant or Bookkeeper) must first invite you. You'll receive an invitation email with a 'Click here' link. It's crucial to use this link for registration; creating an account independently will not connect it to your Account Owner's platform.

Enter your name and create a password, then click 'I’m not a robot’ and ‘Register’.

Basil will send you an email with a verification code. Go to your email inbox to retrieve the code, then enter the code in the available text box.

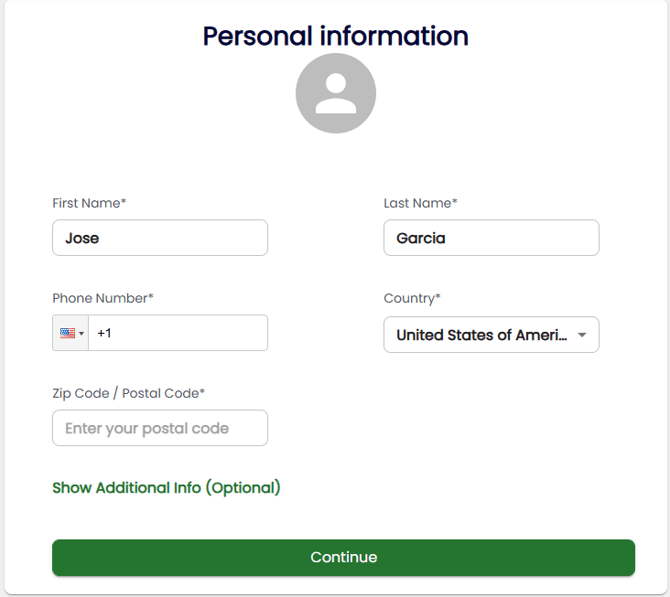
After entering the verification code, you will be taken back to the login screen. Log in, then review and accept the Terms of Services. On the next screen enter your account information. Fields marked with an asterisk are required.
Your Basil account has now been created. The next screen will show your ‘Files’ tab where you can access your documents and Workspaces.

Signing In
To sign in after creating your account, go to https://basil.coraltreetech.com.

You will be brought to the default page.

Working with Files
As a Primary User or Client User, you may be asked to submit documents to Basil. There are several ways to do so:
Uploading Files Through the Home Tab
1. Go to the Home tab (if available) and select the ‘Add Files’ tile.
2. A pop-up window will appear. You can drag and drop your files to the area outlined by the dotted lines. Alternatively, you can click on the text inside the box and it will open a File Explorer window for you to navigate and select the files you wish to upload. If all of the files you’re uploading are of the same type (like W-2s or Income Statements), you can use the ‘File Category’ drop-down list above the dotted box to categorize the files before the upload.
3. Next, click ‘Upload’ in the lower right corner and your files will be copied from your device into Basil.
Uploading Files Through the Files Tab
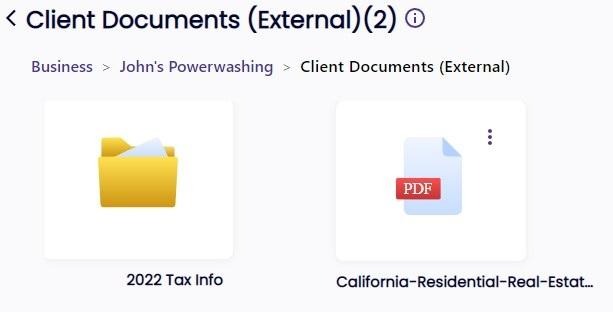
- Go to the Files tab at the top of Basil and navigate to the folder that you would like to upload files to.
- Next, click the ‘Actions’ button at the top-right corner of the screen and select ‘Upload Folder(s) / File(s)’.

- A pop-up window will appear. You can drag and drop your files to the area outlined by the dotted lines. Alternatively, you can click on the text inside the box and it will open a File Explorer window for you to navigate and select the files you wish to upload. If all of the files you’re uploading are of the same type (like W-2s or Income Statements), you can use the ‘File Category’ drop-down list above the dotted box to categorize the files before the upload.

- Next, click ‘Upload’ in the lower right corner and your files will be copied from your device into Basil.
Viewing Files
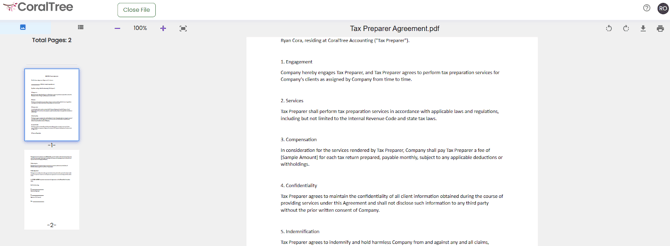
As a Primary User or Client User of Basil, you have the ability to view PDF and image files directly on the Basil platform. Simply click on the file you wish to view and it will open in the same window. When you're done, you can click on ‘Close File’ to return to your documents. Only PDF and image files can be opened and viewed directly on the platform. To view any other type of document (Excel, Word, etc.), you will need to download the file to your computer and then open it in the appropriate software.
Downloading Files
As a Primary User or Client User of Basil, you have the ability to download your files from Basil to your local hard drive. Additionally, downloading a file is necessary to view/edit the contents of any file type (Excel, Word, etc.) besides PDFs and image files, which can be viewed by simply clicking on them in Basil. To download a file:
1. Navigate to the file in Basil that you wish to download.
2. Next, click on the three-dot menu of the file icon/name and select ‘Download’.

3. The file will automatically be downloaded to your browser's default download location (typically your Downloads folder). You can open the file from this location on your computer to view its contents and/or edit it.
Editing Files
You may have spreadsheet or document files in Basil that need to be edited by you. As a Primary User or Client User, you'll have to go through these steps to properly edit the file and share the changes.
1. Find the file in Basil that needs to be updated/edited.
2. On the file's icon/name, there is a lock symbol (the lock should be open). Click this lock so it will show a filled-in golden lock symbol (now closed lock) and your name, indicating that the file has now been locked by you to make changes (as seen in the image below).

3. Now download the file as described in the Downloading Files section above.
4. Edit the file in your preferred document editing software. When you're done, make sure you save all changes then close the program you used to edit the document.
5. Next, go back to the file's location in Basil. You will see that it is still locked by you. Now, upload the file you just edited from your computer to Basil using the method discussed in the Uploading Files section above. When you upload the modified document to its original location in Basil, it will replace what is currently in Basil with your new document and automatically release the file lock. Your changes have now been shared with everyone who has access to this file. The file lock icon should now be back to opened/unlocked.

Completing eSignatures
If you’ve been sent a document to electronically sign, you can go to the ‘Signatures’ tab at the top of Basil.

Click the Title of any rows with a Status of ‘Sign Pending’. You will be taken to a screen to begin signing. Manually scroll through the pages or press ‘Start’ on the top-left to be taken to the elements that need to be signed.

You can click Signature fields to add your signature. You can either type your name, handwrite it, or upload an image containing your signature. Click ‘Save’ when done with signing a Signature element.

Once you’re done signing the document, be sure to click ‘Complete Signing’ on the far right.

The ‘Signatures’ tab of Basil will then show your signed documents. You can view or download them from there.

Completing Tasks
If you’ve been assigned Tasks, you can view them in the ‘Tasks’ tab of Basil. You can click the Task’s name on the tile to view more details.

Once completed with the Task, you can simply click and drag its tile to the Completed section.

Completing Forms
If you’ve been assigned a Form, you can view them in the ‘Forms’ tab of Basil. Please note, Forms are designed to be more like questionnaires and are separate from Signatures. You can click the form tile to begin completing it.

Complete the fields on the next screen and press ‘Submit’ when completed.

Basil Chat
For users linked to Basil Advanced accounts, you can communicate by chat message with those who have access to your folders in Basil by going to the ‘Chat’ tab. From there, you can reply to any messages you may have waiting for you.

To initiate a chat with a Basil user, click ‘Add’ on the left and select ‘New Chat’.

Select the account you’d like to send a message to and then a new chatroom will be made.
Notification Settings
Basil can notify you about important activities within the platform. These include the following:
- Invited Client User Joins Basil
- Document Uploaded
- Document Downloaded
- Document Deleted
- Folder Deleted
- eSignature
- Project Assigned
- Chat Received
Basil provides two ways to receive notifications: by email and within the Basil application itself (in-app).
Email Notifications
Email notifications are enabled by default when signing up for Basil and you will be notified when any of the events listed above occur. The email will include what action was taken, who did it, and where the action occurred (if it pertains to a folder or file).

In-app Notifications
In-app notifications are disabled by default and must be enabled manually. In-app notifications appear within the Basil interface, similar to notifications on your phone or social media apps. Look for the notification bell icon near your username at the top-right. A red dot with the number of notifications you have will appear on top of the bell each time you have a new notification.

To see all in-app notifications and filter them by type (such as User Activity or Document Activity), click 'See more options >' on the notification bell menu.

Managing Notification Settings
You can change your preferences as to how you wish to be notified by clicking the notification bell icon (top-right) and then clicking the gear icon (for settings) or 'See more options >' then 'Preference' to access the notification settings window.

Alternatively, you can click the notification bell icon, then ‘See more options >’ to go to the full notification screen. From here you can click the ‘Preference’ button towards the top-right.

This will open the notification settings window where you can adjust your notification settings as you desire.

Manage Profile Information
You can update your Basil profile information at any time. To do so, click your initials in the top-right corner of the screen and select 'My Profile'.

Once on the profile page, you can change or update any information marked with a 'Pencil' icon (edit icon). These include:
- First Name
- Last Name
- Phone Number
- Mobile Number
- Calendar Link
- Password

If you enter and verify your mobile number, you may receive automated text messages from your Basil Account Owner (typically your Accountant or Bookkeeper) for reminders about eSignatures or Tasks. Click the ‘Not verified’ icon to the right of the Mobile Number field to begin the verification process.
Other options on this page include the ability to enable MFA (Multi-Factor Authentication) and Enable Menu Icons. With MFA enabled, you will need to input a verification code provided either by text message or authenticator app each time you log in. The 'Enable Menu Icons' option replaces the tab text labels (like 'Files', 'Signatures', 'Tasks') with icons at the top of the screen. This is recommended for users with smaller screens or lower resolutions.