If you frequently create the same projects and tasks, you can save time and effort by setting up a project template, allowing you to quickly deploy these task sets whenever needed.
1. Click on the ‘Tasks’ tab at the top of Basil.
2. Next, toggle the view to ‘Projects’ and click the three vertical dots on the top-right and select ‘Templates’.

Then click the ‘+Template’ button on the top-right.
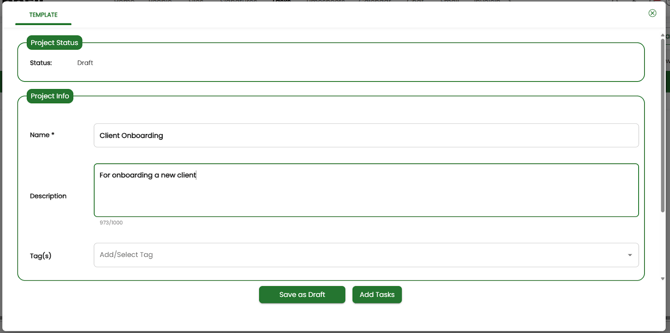
3. Fill out the basic details for the Project Template, including the Project Name. You may also include a Description, Tags, and enable Workflow if the Project’s Tasks must be completed in a specific order.
Click the ‘Add Tasks’ button at the bottom and proceed to the next page.
4. This screen allows you to add the first Task to the Project Template. The Task Title is required, while the Description is optional. When entering the Task Title, you can either select an item from the picklist or type a custom title as free text.
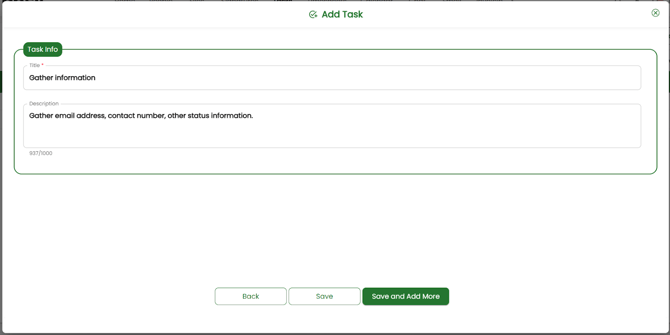
Once you’ve completed the fields you wish to fill out, click one of the following buttons at the bottom of the screen:
- Save and Add More – Adds the task and allows you to create another task for the Project Template.
- Save – Saves the task and takes you to the Tasks list for the Project Template.
5.In the Tasks list, you can edit, delete, and rearrange your Tasks using buttons in the Actions column on the right.
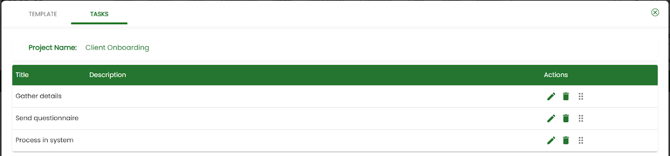
The Tasks list has two tabs which can be seen in the upper left: the TEMPLATE tab and the TASKS tab. Once you’ve finished adding Tasks to the Template, click the TEMPLATE tab to continue.


To use a previously created Project template, follow the steps below.
1. Click on the ‘Tasks’ tab at the top of Basil.
2. Next, toggle the view to ‘Projects’ and click the three vertical dots on the top-right.
3. On the screen, select the ‘Use Template’ icon for the template you wish to utilize.


4. This screen has five sections:
- Project Status: Includes start, end, and due dates.
- Select Client: Allows you to choose the client(s) or your firm, and a workspace for each. You can also apply the project template to any Root Workspaces you may have created.
- Project Info: Where you will enter a name for this project and an optional project description.
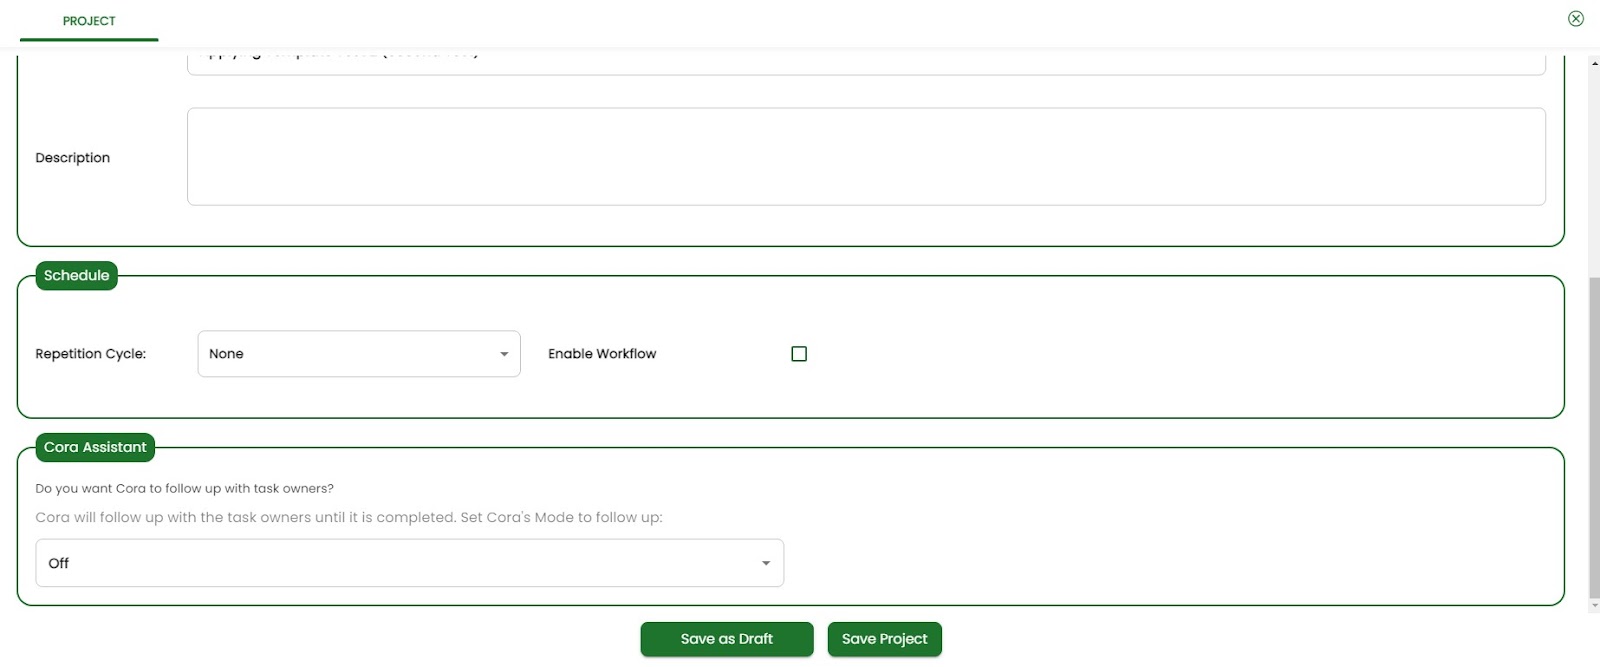
- Schedule: Enables you to select a repetition cycle if needed and choose whether or not to enable a workflow order.
- Cora Assistant: You can choose whether to use the Cora Assistant and, if so, what mode to use. You can read more about the Cora Assistant by clicking here.
You can read more details about each of these sections in our Creating a Project article.
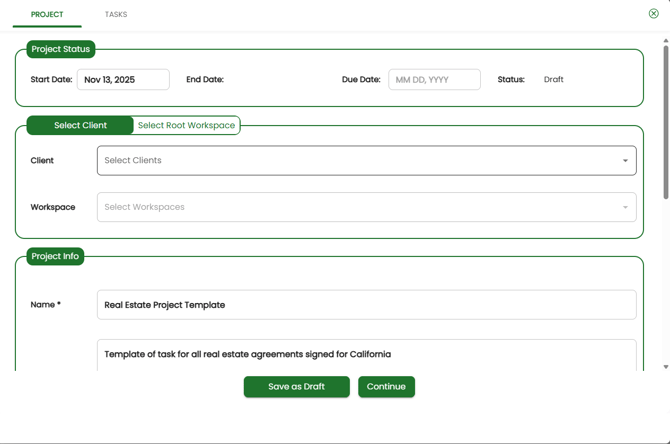
At the bottom are two buttons: “Save as Draft”, and “Continue”. “Save as Draft” will save the templated project and allow you to come back to it later for further editing. Clicking “Continue” will advance you to the next step, changing the buttons at the bottom (adding a “Save as Template” button and a “Launch” button) and adding a “Tasks” tab at the top-left, which allows you to edit the details of the Project’s nested Tasks.


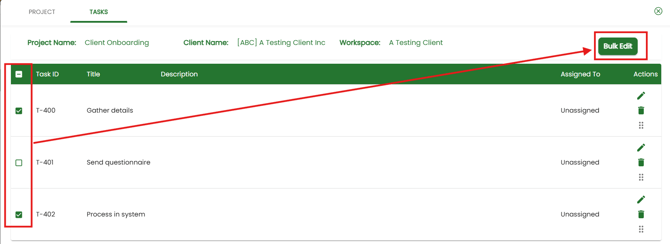
5. You can edit values (such as Assignee) for multiple Tasks by using the checkboxes on the left to select, then clicking ‘Bulk Edit’.
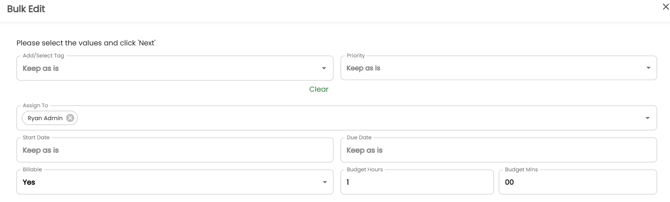
Use the next screen to select which values you’d like to edit in bulk. Then click ‘Next’, and ‘Update’ on the subsequent screen.
6. Once all tasks have been listed, assigned, and had details saved, you can click ‘Launch’ to launch the Project.
7. You'll be brought back to the Projects section of the Tasks tab. The Project and Tasks you just created will be active and Basil will have notified all participants.
Editing a Project Template:
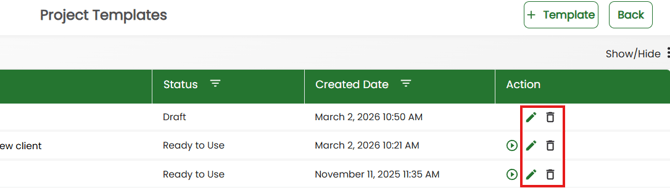
To edit or delete a previously created Project Template, follow the steps below.
1. Click on the ‘Tasks’ tab at the top of Basil.2. Next, toggle the view to ‘Projects’ and click the three vertical dots on the top-right.