
This article is intended users under the Basil Advanced plan. Basil Simple users can refer to this article.
Folder Templates is a feature of Basil that allows you to quickly and easily create a predefined structure of folder(s) and subfolders for a new project or tax season and deploy these empty folders to as many clients as needed.
To create Folder Templates:
First, navigate to the ‘Files’ tab of your Basil platform and then select the ‘Configure’ button.

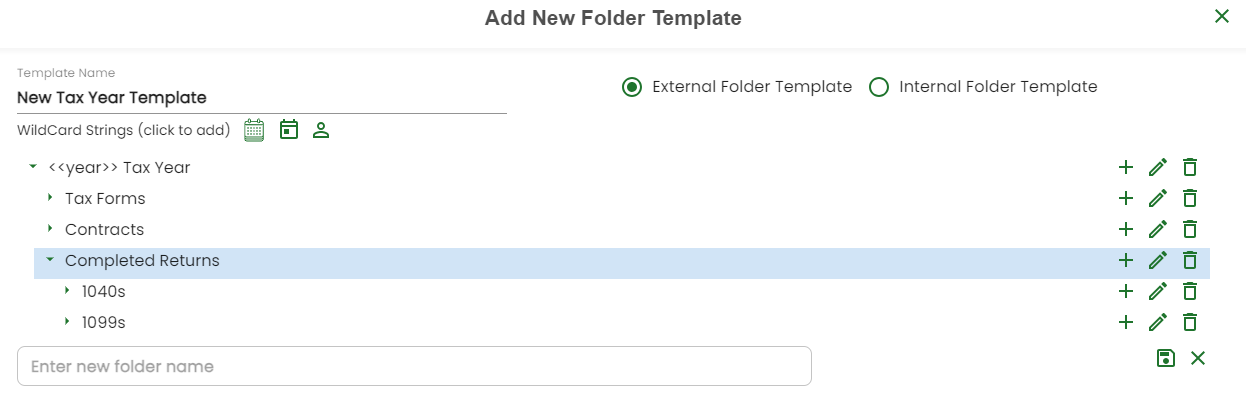
On the Folder Template screen, select either an ‘Internal’ or ‘External’ folder template to create, then click on the ‘+ Add’ button in the top right of the page.

Next, you’ll need to name this new Template and determine where these new folders will be located. Determine if the template will be in the Client’s External Folder (visible to the client) or the Internal Folder (only visible to you and your Team Members). This cannot be changed once set.
If the ‘Root Folder Template’ checkbox is checked, and if future changes are made to the folder structure of the Folder Template, all Client folders that were created using this template should automatically reflect the updated changes. If not checked, then updating the template will not affect the Client folders already created through the template. This checkbox cannot be changed once set.

Then you can start building out your folder structure as you’d like it to appear. At least one folder is required to create a Folder Template so the system gives you a spot to name your first folder right away.

When naming your folders, Basil gives you the option to use Wildcard strings in the folder names. Wildcards are dynamic text that will automatically change the displayed information based on when you apply the template and to which client. The Wildcard options currently available are: Year, Month, and Client. You can add the specific Wildcard to the folder name by clicking on the associated button in the Wildcard options near the top.
In the displayed example, we’re creating a folder with the ‘Year’ Wildcard for a Tax Year folder that can be dynamically applied at the start of each tax season.
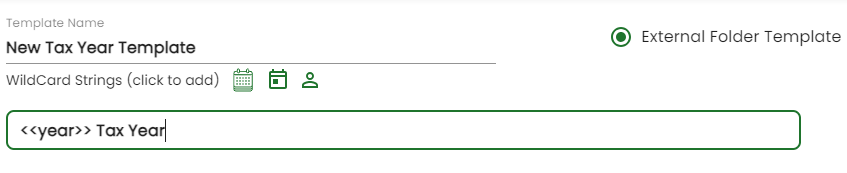
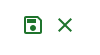
When you’re done naming your folder, click the ‘Save’ icon to the right to confirm it. Or the ‘X’ symbol to clear the folder name and start again.
Once the folder name has been confirmed, you can then create another new folder on the same level as the first folder by typing in the ‘Enter new folder name’ box below. You may also choose to edit the first folder by clicking on the ‘Pencil’ symbol or remove the first folder by clicking on ‘Trash Can’ symbol across from its name.

You can also create subfolders for each folder you have already created by clicking on the ‘+’ symbol across from the folder in question. You can then repeat the same processes mentioned above until the folders and subfolders are in a structure that meets your needs.
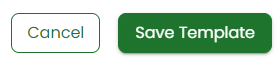
Once the folders appear to your liking, you can click on the ‘Save Template’ option in the bottom right to save this folder structure for use or click ‘Cancel’ to cancel the process.
Once a Folder Template has been successfully created it will appear in the list of available templates on the ‘Folder Templates’ screen as either an External or Internal Folder Template.

On this screen, you will also have options for the saved templates in the ‘Actions’ column for each template such as: ‘Apply’, ‘Edit’, ‘Copy’, or ‘Delete’.

Applying a Folder Template:
To apply a Folder Template first head over to the ‘Files’ tab of Basil, click the 'Configure' button, and go to the ‘Folder Templates’ subtab.

Find the template you wish to apply in the list of saved templates and select the ‘Apply’ button.

This will open the ‘Apply Template’ window for you. On the left side, you will see the folder structure of the template as it will be applied. (Wildcard fields such as <<Year>> will be auto-filled in once the template is applied). On the right-hand side, you will see your list of clients.
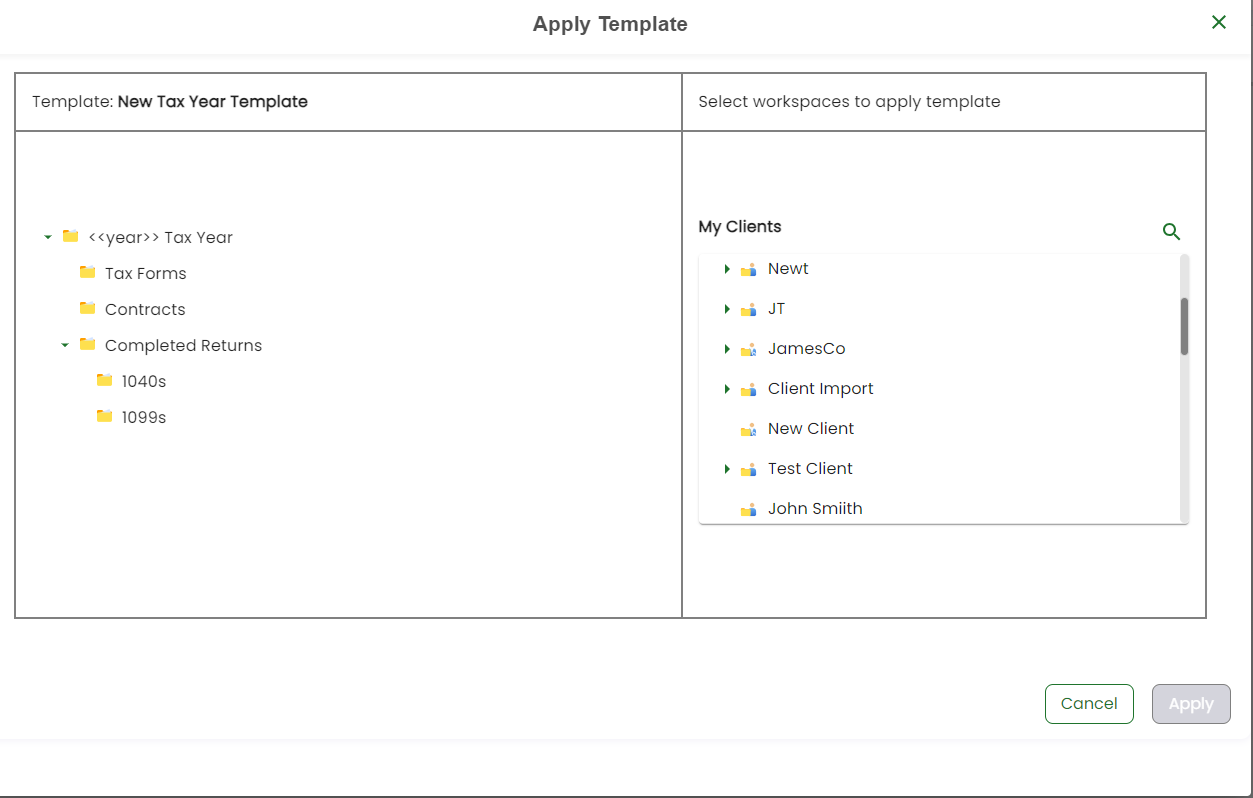
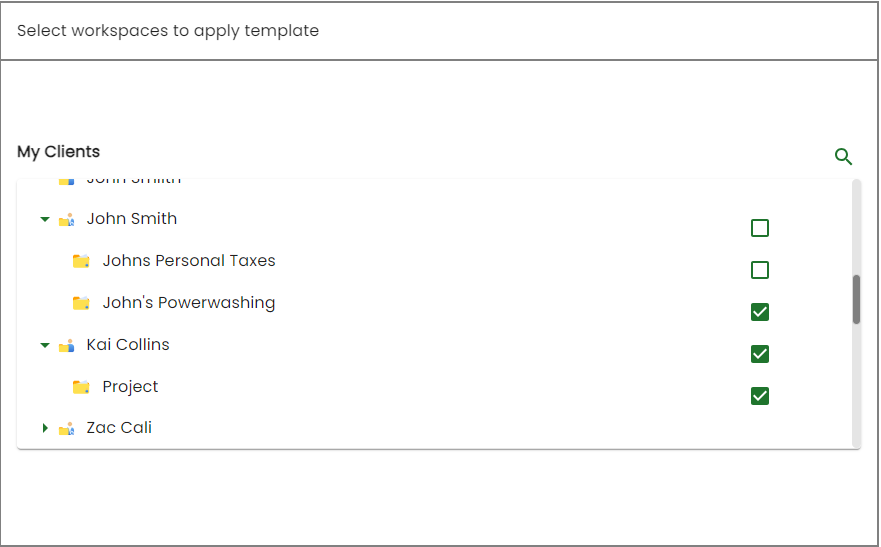
You’ll want to determine which clients will need this template. Once you know this, you can click on the Client’s name to expand the Client and see their list of Workspaces. Checkboxes will appear to the right of the expanded Client. If you wish to apply the template to all of the Client’s Workspaces, you can click on the checkbox next to their name and this will select all of their Workspaces. If only one of a Client’s Workspaces needs the template, you can put a checkmark next to the specific Workspace.
If you need to search for a specific Client or Clients, you can use the ‘Magnifying Glass’ icon to the right on this screen to search for clients.
Once all the required Clients have been selected, you can click on the ‘Apply’ button in the bottom right to apply this template and be taken back to the previous screen. Or you can click ‘Cancel’ to cancel the process and go back to the previous screen.

You will be prompted to confirm your selection. You can refer to this FAQ article for more details
After you have applied the template, you should get a confirmation message in the lower right-hand corner of the screen stating that the template has been applied successfully.

If you apply 5 templates within a 10 minute window, the system will provide a denial message. You can try clicking Apply again after 10 minutes. (Applying a template to multiple workspaces simultaneously counts as a single action toward this limit).

You can now go to any of the Client’s folders that were part of this application and start working with the newly created folders.
