
Basil Drive (also known as Basil Explorer) allows Account Owners to sync Basil files and folders between the Basil cloud and a local computer or network. It is commonly used for local file editing, large file operations, and compliance-related backups or archiving.
Important Limitations:
-
Basil Drive must be enabled by CoralTree Support and is not enabled by default
-
Available only on Windows
-
Can be used by only one user per Basil account
-
Recommended for the Account Owner's computer or server only
Enabling and Installing Basil Drive
First confirm if Basil Drive is enabled for your account. Log into Basil as the Account Owner, select your profile icon at the top right of Basil, and see if 'Basil Drive' is listed as an option. If it’s not, please contact CoralTree Support and ask for it to be enabled for your account.
Once enabled, clicking the ‘Basil Drive’ button in Basil will take you to the Basil Drive download page. Click the ‘Download Basil Drive Client’ button to download and run the setup.exe file to install the Basil Drive Client.

This will take you to the Basil Drive download page. Click the ‘Download Basil Drive Client’ button to download and run the setup.exe file to install the Basil Drive Client.

Once it has been installed, it will ask you to log into the Basil Drive software with the Account Owner’s username and password.

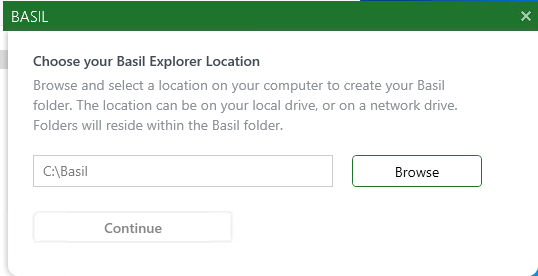
After signing in, it will ask you where you would like to store the files that will be synced back and forth between the computer and the Basil cloud service. It’s recommended to choose the root C: drive on your computer or root network drive to avoid issues related to maximum file path length. This will create a folder called ‘Basil’ on the computer. Be sure to never rename, move, or delete that folder, otherwise it may cause Basil Drive to need to be completely reconfigured. It is highly recommended that you select a location outside of the control of other syncing or backup software such as OneDrive, Google Drive, Carbonite, etc. in order to avoid syncing issues.
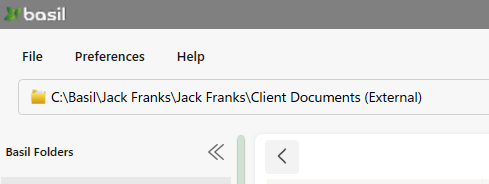
The Basil Drive Explorer will pop up and begin syncing down your client folders and files.

Basil Drive runs in the background, starts automatically with Windows, and can be accessed from the Windows Taskbar or system tray. It is designed to remain running while your PC is on.
Using Basil Drive to Add and Edit Files
With Basil Drive installed, you can add compatible files to any Workspace’s Internal/External folders or their subfolders as well as edit any documents already uploaded to Basil.
You can add files to Basil using Basil Drive using multiple methods:
- Use the Basil Drive Explorer or Windows File Explorer to drag and drop files into the respective Workspace folders. Basil Drive will see these new files and then sync them up to the web.
- Create a new document in your editing software such as Word or Excel, and then save the new document directly to the folder on your computer that is being monitored by Basil Drive. Similarly, once Basil Drive sees the new file it will be synced to the web.
- Existing files can be copied from a location on your computer or removable drive and then pasted to the appropriate Workspace folder by using Copy/Paste with either the Basil Drive Explorer or Windows File Explorer.
Currently, folders created through File Explorer will not automatically upsync to the Basil cloud. You must first create the subfolder through the Basil site. Deleting files must also be done through the Basil site only, as deleting through File Explorer will force the files to be re-downsynced.
Editing files using Basil Drive:
First, navigate to the file you need in either the Basil Drive Explorer or Windows File Explorer.

Then, double-click the name of the file to open it in your preferred editing software. Once the file has been opened it will ask you if you wish to ‘lock’ the file. You will want to say ‘Lock File’ if you plan to make changes to the file and plan to sync them.

The file will then be ‘locked’ in Basil Drive and the Basil Web Application which will prevent other users from making changes while you are working on the file. (If opening a PDF in Acrobat or similar software, you will not get a lock prompt but the file should still automatically lock once you’ve saved your changes).
Once you are done making your changes, save your work and close your editing software and the file will then sync to the Basil Cloud and the file will ‘unlock’ making it ready to be viewed or edited by other users.
Using Basil Drive to Backup/Archive Files
Basil Drive is commonly used to create local backups for compliance, archiving, or offboarding clients. Once Basil Drive has been installed, it will download all of your client files to your local machine or network drive. This can take up to several hours. Once all are downloaded, simply use your Windows File Explorer to navigate to the location where Basil Drive is storing them.
Using Windows File Explorer you can highlight files/folders you would like elsewhere on your PC and right-click them to ‘Copy’ or ‘Compress to a ZIP file’.

If they have been copied, then navigate to where you’d like to store them (like on a thumb drive or network drive), and simply right-click and choose ‘Paste’. If you compressed them to a ZIP file, drag the ZIP file out of this location and place it where you want it.
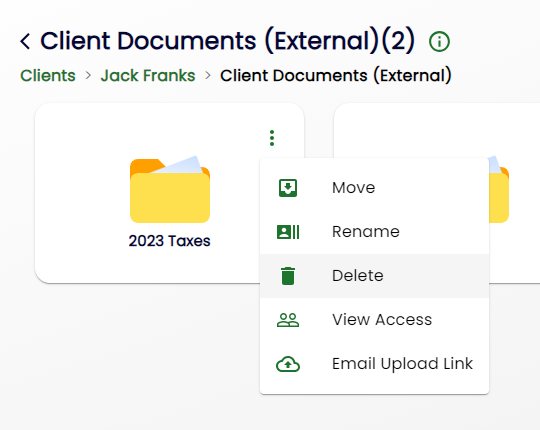
Once the files have been backed up and archived, you can delete the original files/folders by using the 3-dot ‘Actions’ menu from the Client’s Workspace ‘Files’ tab of the Basil Web Interface.
If you backed up the files because you are no longer working with the client, then use the Basil Web Interface to remove the Client and all associated workspaces and files. To do this go to the ‘People’ tab, locate the appropriate Client, click the 3-dot ‘Actions’ menu, and choose ‘Delete’. (Deleting files locally via File Explorer will cause them to re-downsync.)

Preventing Path Length Errors
Windows imposes a character limit on file paths. If a folder path and filename combined exceed approximately 248 characters, Basil Drive will encounter sync errors and fail to process the files. Use the following methods to prevent this issue:
- Upon installing Basil Drive, it will ask you where you would like to store the files. It’s recommended to choose the root C: drive on your computer or root network drive (example: C:/ or Z:/). You can relocate this location by going to the Preferences tab of Basil Drive and selecting ‘Move Basil Location’.

- Go to Settings > File Settings > Enable Path Length Validation. Enable this setting and set a Max Path Length, such as 240 characters. Going forward, Basil will prevent users from adding files or folders if it were to put it over the defined path length.


- Avoid creating and adding files, folders, clients, and workspaces with long names. For example, if you have a client named ‘Value-Added Land & Ocean Resources LLC’, consider shorting their client and workspace names to simply ‘VALOR’.
Installing Basil Drive on a network location
Due to Basil Drive’s current design, it can only be enabled on one user per Basil account. It is recommended that the Account Owner be the one to activate and install the application.
To allow multiple team members to edit files locally (instead of via the Basil Web Interface), Basil Drive should be installed on a central file server or host computer that shares a folder over a Local Area Network (LAN). Team members must connect to this shared folder via mapped network drives for Basil Drive to monitor and sync files correctly. This setup is only suitable for users on the same LAN (e.g., in the same office) and will not work for remote employees.