
Team Member accounts are for users who are employees or associates of the Account Owner’s Firm and require access to any or all of the following:
- A specific Client’s Internal and External folders
- All Client folders
- The Firm’s own folders
Team Members are billable users just like the Account Owner. The Account Owner will be billed for themselves and each Team Member that is added to their account. Team Members are initially added by the Account Owner and can also be added by a Team Member with the Admin role.
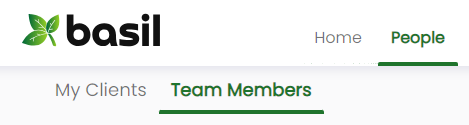
- You can add Team Members by clicking the ‘People’ tab at the top of Basil.
- Then select the 'Team Members’ subtab.
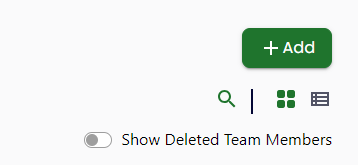
- You should now see a screen displaying your Team Members.
- To the top right will be a ‘+ Add ’ button, click this to add a new Team Member.
- You can add users by entering their email address on the window that appears.
- Select the role they should be given from the drop-down list (see permissions by Role below).
- When you’re done adding the information for each Team Member, click ‘Send Invite’. Basil will send an email to the invited users asking them to join Basil and set up their account(s).
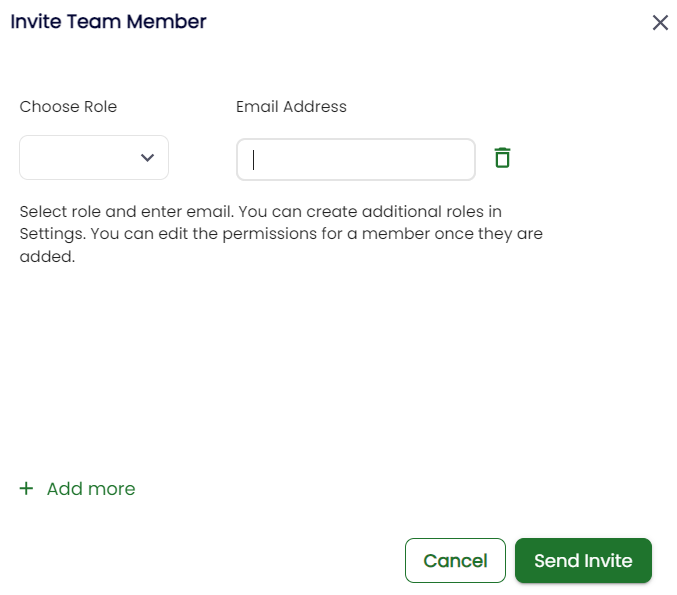
Note for step 5: You can invite more than one user at a time by selecting the '+ Add more' option near the bottom of the window.
Team Member Roles and Permissions
A role must be selected when adding a new Team Member. Here are the permissions for each role you may invite a Team Member with. You may also customize roles and permissions on your settings page by following these instructions: Customize User Role Permissions.
Admin
Admin Team Members, by default, have most of the same permissions as the Account Owner, including access to all Clients and all ‘My Firm’ folders and documents. They can add/delete Clients and all users with the exception of the Account Owner.
Regular
Regular Team Members, by default, have limited access and need to be invited to specific Client Workspaces for which they need to work. They will be able to add/edit/delete all files and folders for the Client Workspaces they are assigned to.
Consultant
Consultant roles are similar to Team Member roles and have their own assignable permissions, but they can be toggled to be Active and Deactivated. This is ideal for when you have users who will not be working on your Basil Clients all year round so they can be excluded from your Basil monthly bill. To toggle a Consultant user’s status, go to the People tab and Team Members subtab, then click the three-dot button. Consultants when activated will be billable for at least one month. When deactivated, they will not be able to work in Basil until activated again.
Please note: Each user’s role can be changed at any time, after they have been invited to the Team, by going to the People tab, clicking on the three-dot menu for their user icon, and choosing ‘Edit’. Select the pencil icon in the Actions column for the Team Member if you are in the list view.