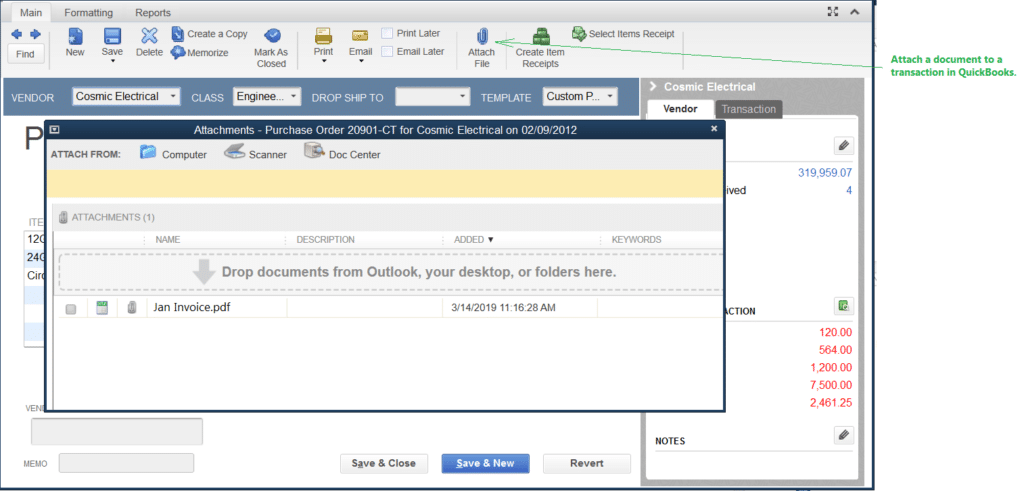
Qbox: QuickBooks Attachments

QuickBooks keeps attachments in a specific folder structure, inside the folder named ‘Attach’, which is located in the same folder as the Company files. Qbox can be used to share these attachments along with the Company files. Attachments can be added by the Account Owner and their Shared Users and/or Team Members who have been given ‘Admin’ permission for the Sync folder containing the files. Please note that each ‘Attach’ folder will be billed separately at the same rate as the sync folders when shared on Qbox. As there can be thousands of attachments, we recommend that the user who ‘owns’ the company files (the user from whose computer the company files were originally copied into Qbox) create the Attach folder and share the attachments. The Account Owner, who may be different from the user who ‘owns’ the company files, will need to perform the final steps to enable the Attach folder to be shared in Qbox. Please review the instructions below.
Quick instructions
- If you already have attachments for the company in QuickBooks, please make a copy of the folder named ‘Attach’, and all its contents, and save them on an external drive or a memory stick. This is important to avoid any inadvertent loss to attachments. Please note that QuickBooks does not backup attachments and you need to keep a backup separately.
- If you do not have any attachments for the company file and starting new, first create an attachment for a transaction in the Company file. This will create the Attach folder structure for the company that can then be shared.
- If you are the owner of the Qbox Sync folder containing the Company file, go to step 4. If you are a shared user, make sure that the owner has given you ‘Admin’ permission, and proceed to step 4.
- On the Qbox Explorer, go to Settings and uncheck the box labeled ‘Hide Items not shared’. Then refresh the Qbox Explorer.
- Select the Sync folder containing the company file and attachments. The folder named ‘Attach’ should be visible. Right-click on the folder and select ‘Share on Qbox’. The Attach folder will be shared on Qbox.
- Now the owner of the Sync folder needs to enable attachments – sign in at the Qbox website qboxplus.com, select the Sync folder on the left-hand side panel. Right-click on the ‘Attach’ folder and select ‘Enable attachments’.
- Restart the Qbox Explorer by selecting ‘File’ and ‘Restart Qbox’. After restart, Qbox will sync the attachments to the cloud and share them with the other users. Going forward, new attachments will be added and synced as and when they are created.
- Please note that attachments for all the QuickBooks company files in the same Sync folder are saved and synced in the same Attach folder, in separate sub-folders.
- If another shared user has existing attachments that are not shared, their Attach folder in the Sync folder will be renamed to ‘conflicted copy’, after step 5. The user will need to copy the attachments from the conflicted Attach folder to the newly created Attach folder using the same directory structure, to make them viewable in QuickBooks.
Detailed Instructions with Illustrations
- If you already have attachments for the company in QuickBooks, please make a copy of the folder named ‘Attach’, and all its contents, and save them on an external drive or a memory stick. This is important to avoid any inadvertent loss to attachments. Please note that QuickBooks does not backup attachments and you need to keep a backup separately.

- If you do not have any attachments for the company file and starting new, first create an attachment for a transaction in the Company file. This will create the Attach folder structure for the company that can then be shared.

- If you are the owner of the Qbox Sync folder containing the Company file, go to step 4. If you are a shared user, make sure that the owner has given you ‘Admin’ permission for your Qbox account, and proceed to step 4.
- On the Qbox Explorer, go to Settings and uncheck ‘Hide Items not shared’. Then refresh the Qbox Explorer.

- Select the Sync folder containing the company file and attachments. The folder named ‘Attach’ should be visible. Right-click on the folder and select ‘Share on Qbox’. The Attach folder will be shared on Qbox.

- Now the Account Owner (or Team Member with Admin permissions) of the Sync folder needs to enable attachments. Sign in at the Qbox website www.coraltreetech.com/qbox and navigate to the Sync folder. On the three-dot Actions button for the associated ‘Attach’ folder, select ‘Enable attachments’.
- Restart the Qbox Explorer by selecting ‘File’ and ‘Restart Qbox’. After restart, Qbox will sync the attachments to the cloud and share them with the other users. Going forward, new attachments will be added and synced as and when they are created.

- Please note that attachments for all the QuickBooks company files in the same Sync folder are saved and synced in the same Attach folder, under separate sub-folders.
- If another shared user has existing attachments that are not shared, their Attach folder in the Sync folder will be renamed to ‘conflicted copy’, after step 5. The user will need to copy the attachments from the conflicted Attach folder to the newly created Attach folder using the same directory structure, to make them viewable in QuickBooks.