Folders and Files can be created and uploaded to four main locations on Basil for sharing and collaboration. These locations include:
- Inside the ‘External Folder’ of each Workspace
- Inside the ‘Internal Folder’ of each Workspace
- Inside any folder created at the ‘My Firm’ Workspace level
- Inside any folder that is nested in any of the previously mentioned folders
Creating a New Folder
Once inside any of the locations above you can start creating new folders to organize your client files. To do so, click on the ‘Actions’ button in the top right. A drop-down menu will appear where you can select ‘New Folder’. A pop-up window will appear allowing you to type a name for this new folder. Enter the name you desire and then click ‘Add’. The pop-up will disappear and you will see your newly created folder on the screen.


Creating a New File
Basil gives you the ability to create and edit documents directly in the cloud from your web browser in multiple formats.
- Create: Word document (.docx), Excel spreadsheet (.xlsx), and PowerPoint presentation (.pptx)
- Edit: Word document (.docx, .doc), Excel spreadsheet (.xlsx, .xls, .csv), and PowerPoint presentation (.pptx)
To create a new file in Basil with the document editor:
- Navigate inside the folder where you would like the document to reside.
- Click the ‘Actions’ button at the top right and select ‘New File’ from the drop-down menu.
- A pop-up window will appear asking you for key information about this new file.
- Enter the name of this new file.
- Choose the type of file: Word document (.docx), Excel spreadsheet (.xlsx), and PowerPoint presentation (.pptx)
- Choose a file category if you wish to categorize the file. Document categories help identify a document without having to open it.
- When finished, click the ‘Add’ button in the lower right corner and you will be taken to the document editor. Make sure to ‘SAVE’ the document at the top right before closing with the ‘Close File’ button at the top left.

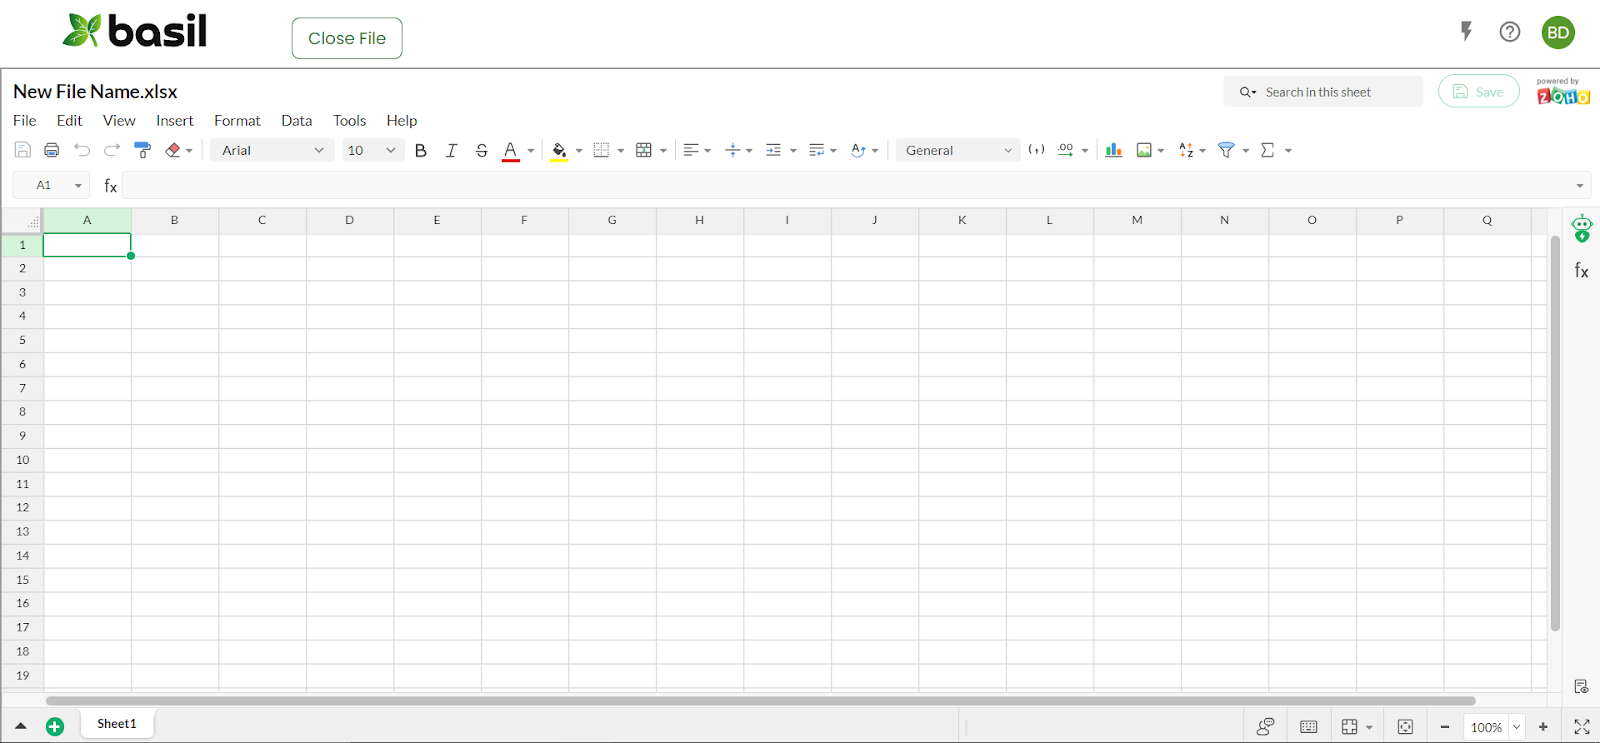
The document editor (powered by Zoho) allows you to create and edit documents in the cloud from any supported browser. This editor has many of the same features that you come to expect when working with a program such as Microsoft Word or Excel, but it is all in the cloud. Not all native functions of the Zoho editor and Microsoft Office products are compatible with each other, such as checkboxes and Zoho picklists. For full Microsoft Word and Excel functionality, we recommend downloading the file from Basil, editing it externally, and then re-importing it back into Basil.
Uploading Files
You most likely already have files on your local hard drive that you’ve created while working with your clients and internal staff. You can upload these documents from your PC to Basil provided they are a supported file type: Word (.doc, .docx), Excel (.xls, .xlsx, .csv), Powerpoint (.ppt, .pptx), PDF (.pdf), ZIP Files (.zip), and some image types (TIFF, JPG, JPEG, PNG).
To upload a file:
You most likely already have files located on your local hard drive that you’ve created while working with your clients and internal staff. You can upload documents from your PC to Basil provided they are a supported file type.
To upload a file:
- Navigate inside the folder where you would like the file to reside.
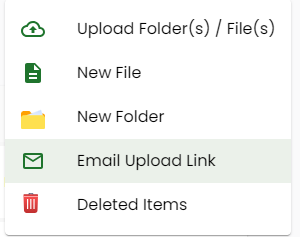
- Click the ‘Actions’ button at the top right and select ‘Upload Folder(s) / File(s)’ from the drop-down menu.
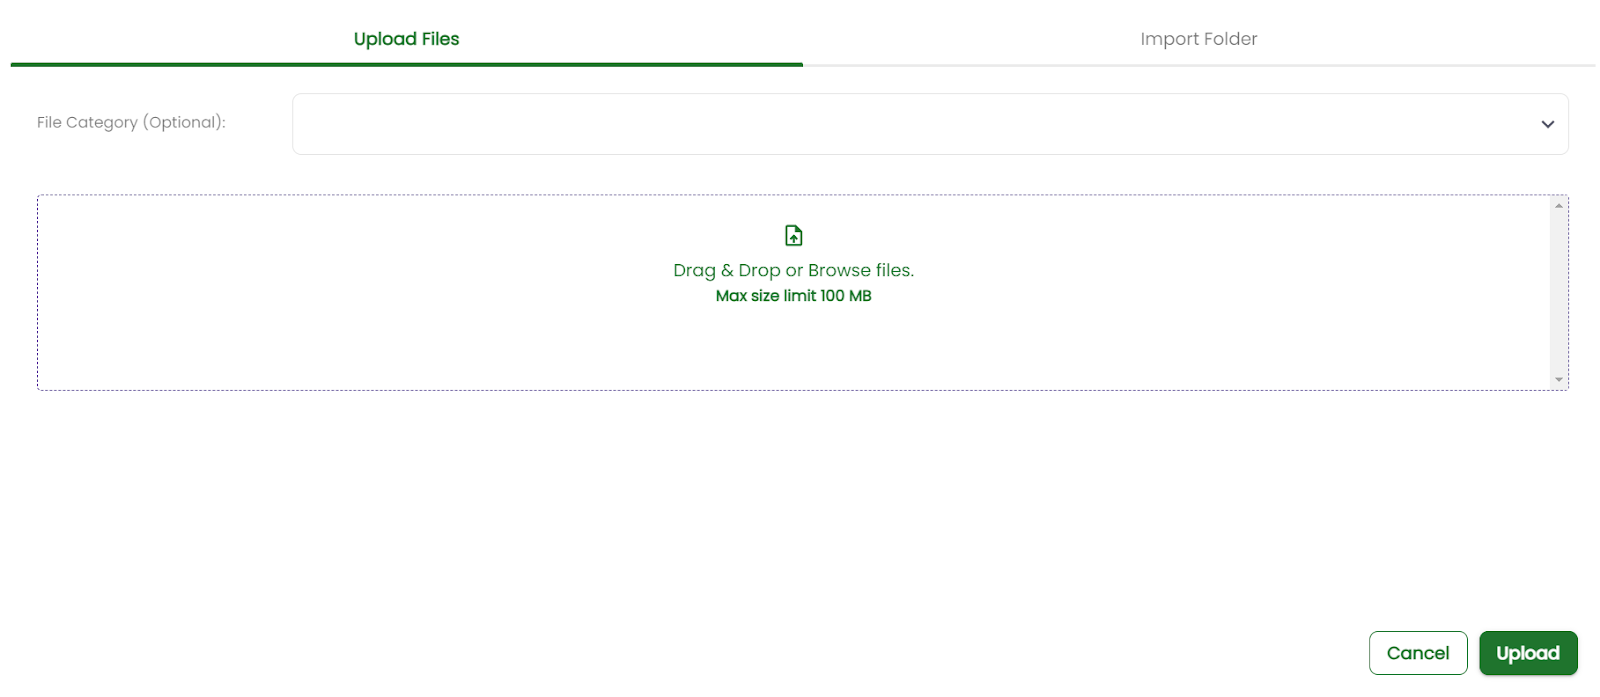
- A pop-up window will appear, make sure you are selected to the ‘Upload Files’ tab at the top.
- You can drag and drop your files to the area outlined by the dotted lines or you can click on the text inside the box and it will open a Windows File Explorer window for you to navigate and select the files you wish to upload. If all of the files you’re uploading are of the same type (like W-2s), you can use the ‘File Category’ drop-down above the dotted box to categorize the files before the upload.
- Next, click ‘Upload’ in the lower right corner and your files will be copied from your local hard drive and into Basil.
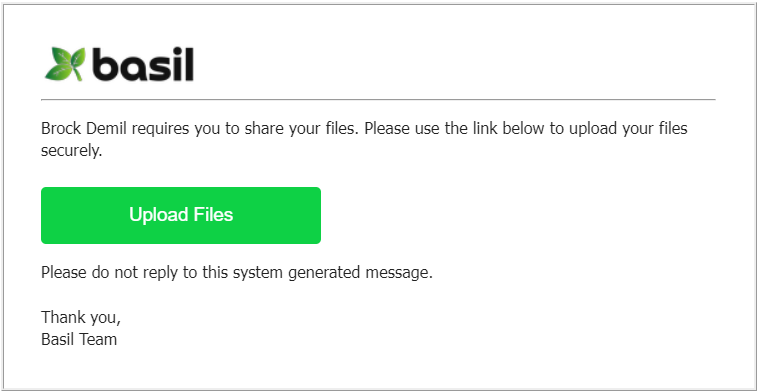
Requesting a File Upload
You can use the “Email Upload Link” tool to request files from someone in any Client's External folder you choose and these people do not need to be registered with a Basil account. You may also use this tool for users who do have a Basil account to make the upload process simpler for the user uploading the file(s).
To request a file upload:
- Navigate to the Client's External folder where you would like the individual to upload the file(s).
- Click the ‘Actions’ button at the top right and select ‘Email Upload Link’ from the drop-down menu.
- Select an existing user or go to the ‘New Contact’ tab to enter the individual’s name and email address (click ‘+ Add more’ to email additional people), optionally write a message, then click ‘Send Email’.
- The individual the link was sent to will receive an email and will need to click the ‘Upload Files’ button. They will be brought to the upload files popup window where they can drag and drop files, or browse and select files from their PC.

Uploading Folders
You may have a folder on your computer that already contains all the subfolders and files that you and your client or team members have been working on. You can upload that entire folder at one time and it will be copied in Basil with the same structure.
To upload a folder:
- Navigate to the location where you would like the folder and its contents to reside.
- Click the ‘Actions’ button at the top right and select ‘Upload Folder(s) / File(s)’ from the drop-down menu.
- A pop-up window will appear, click the ‘Import Folder’ tab at the top.
- If you don’t see the ‘Import Folder’ tab at the top, please reach out to Basil Support to enable it for the account.
- If you don’t see the ‘Import Folder’ tab at the top, please reach out to Basil Support to enable it for the account.
- Click the text in the box to open a Windows File Explorer window and navigate to the folder you wish to upload.
- Select that folder and then click ‘Upload’.
- A pop-up window will appear at the top of the screen asking if you want to allow your files to be uploaded. Click the ‘Upload’ button to proceed.

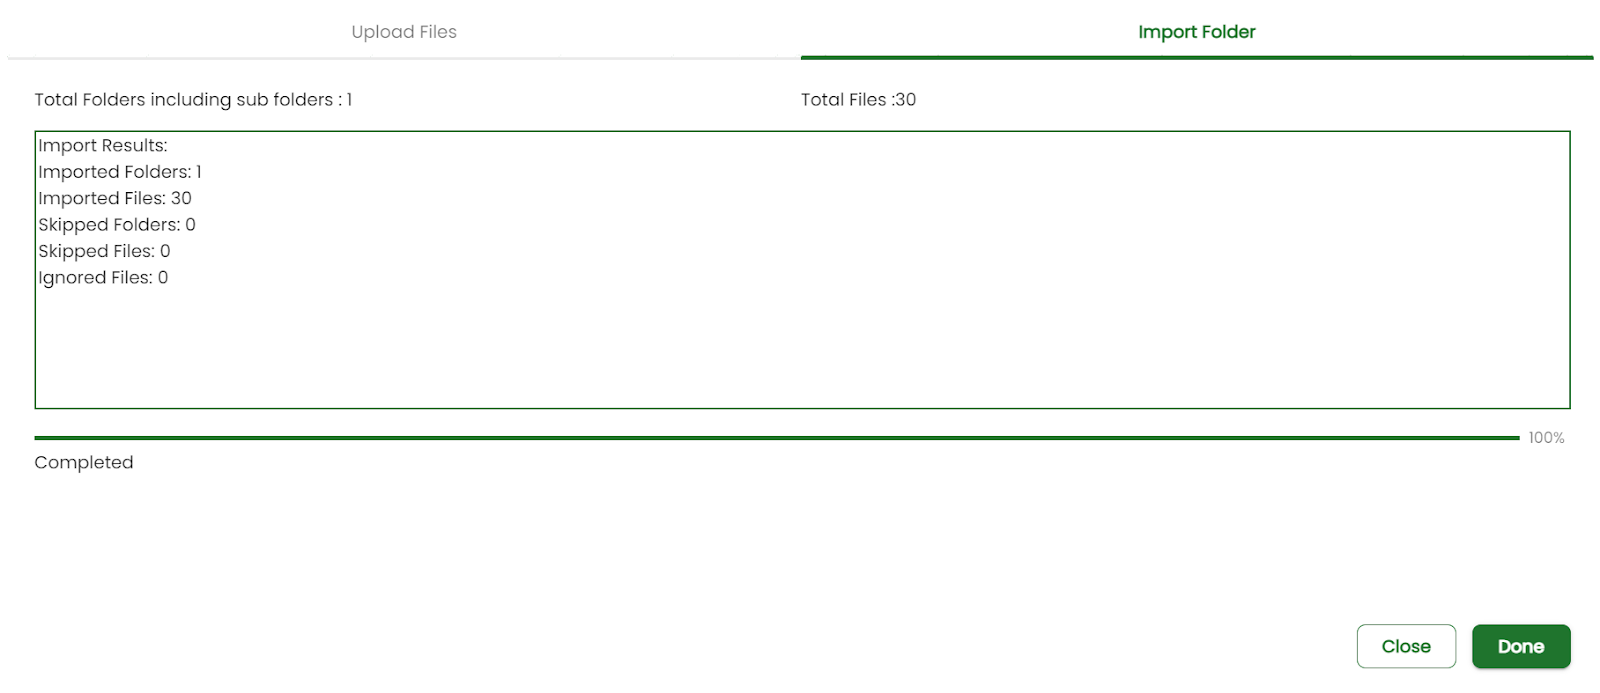
- Click ‘Import’ in the lower right corner.
- Your files will be copied from your local hard drive, into Basil, and you will see a summary on the screen.
- Click ‘Done’ and you’ll be back at your Basil location with your newly uploaded folder and its contents.