
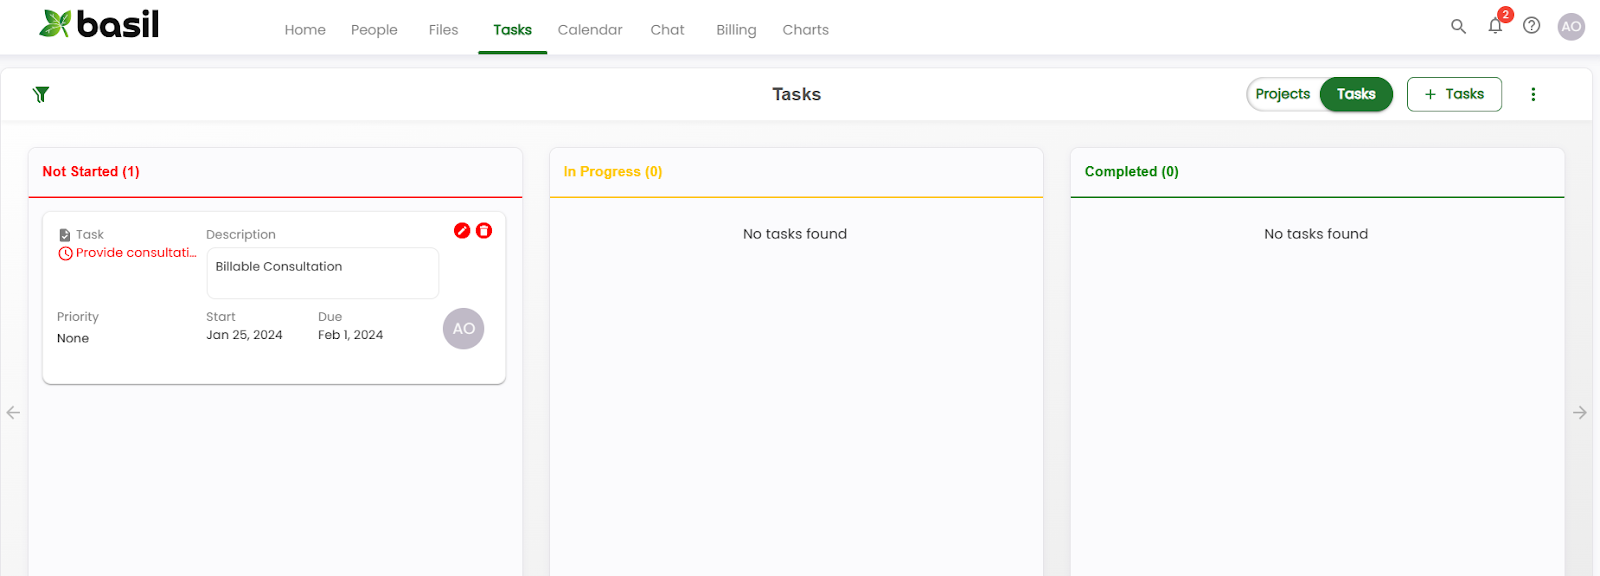
The primary view of tasks on the Basil Platform is called the ‘Placard’ or 'Kanban’ View and it offers users a dynamic Kanban-style board that can be customized to fit the business’s unique workflow.
By default, the Placard View is set up with 3 Statuses (also known as Stages): Not Started, In-Progress, and Completed.
You can customize the Placard View by adding your Statuses and moving them around to fit your business’s task workflow.
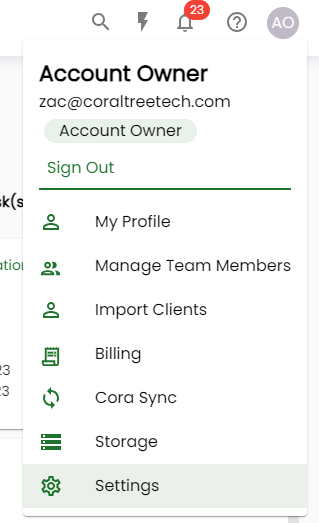
To create a new task Status, first, go to your Profile Dropdown Menu at the top right of the page and select ‘Settings’.
From here, expand the “Manage Task Statuses and Types” menu.
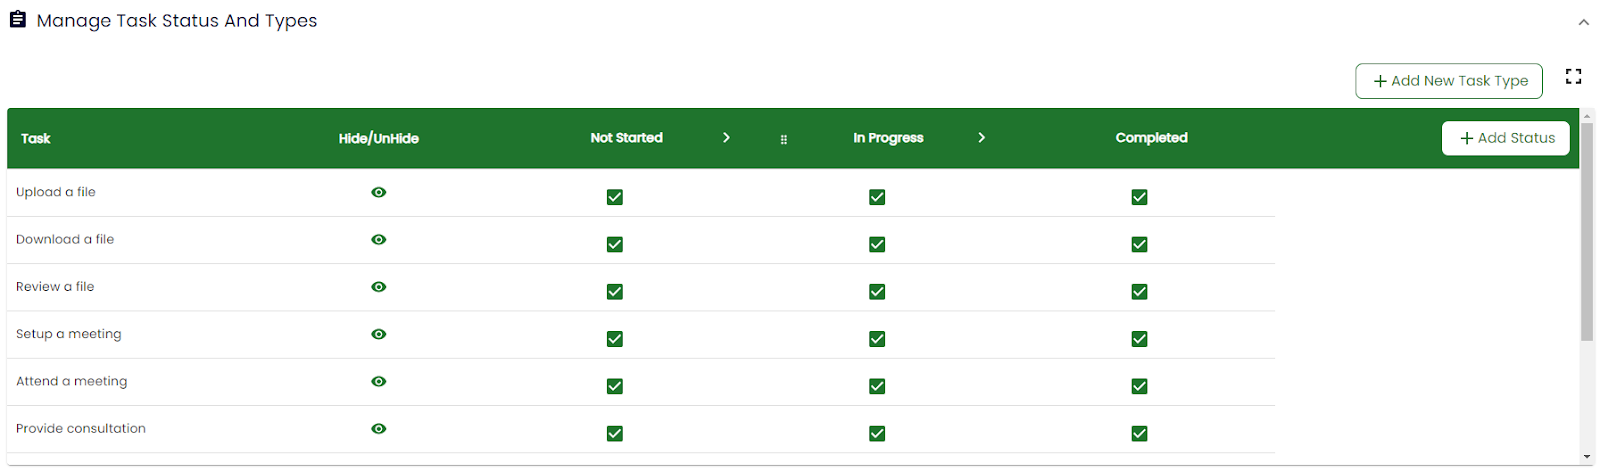
Click on the ‘+Add Status’ button on the right side.
In the pop-up window, type the name of the new stage you wish to add.
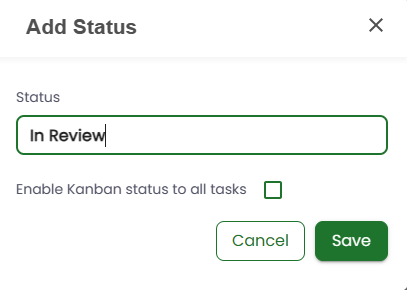
Please note: the 'Enable Kanban status to all tasks' checkbox refers to the different types of tasks. If you select this option, all task types will be allowed in the new Status. If you do not select this option, you will need to manually select the task types that will be allowed in this new Status.
Once the new Status has been saved, it will appear in the list of all Statuses. If you did not select the ‘Enable Kanban status to all tasks’ checkbox, it is here where you can select the allowed task types for this new Status.
To change the order of the Statuses, you can click and drag on any Status that has the '6-Dot' or 'Handle' icon to its left. You can drag it left or right to place it where you want in the workflow order.
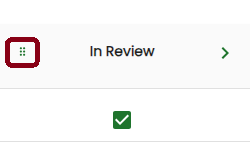
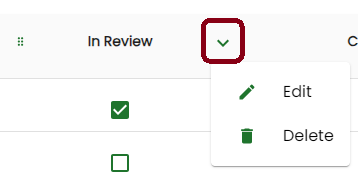
If you wish to rename or delete a task status, simply click on the ‘>’ symbol to the right of the status name to edit its name or delete it.
Please note: Even when customizing the board with your own task statuses, the “Not Started” and “Completed” statuses cannot be moved in the workflow order and will always be the first and last statuses.
Once you have the statuses named and appearing in the order you like, you can then go back to the “Tasks” tab and view your new task statuses in the Placard (Kanban) View.

The first three statuses will always appear on the screen first when you go to the “Tasks” tab. To view the additional statuses, you’ll need to click on the right navigation arrow to view the additional statuses.

These arrows are on the left and right sides of the screen and allow you to move back and forth through your visible statuses.

You can now use the tasks feature as you normally would but now with your custom statuses to keep track of your progress each step of the way.