
In Basil, you can bill or invoice your clients for the work performed by you and your team members. You can create a bill in PDF format and attach it to the invoice you send using your existing invoicing system, or you can invoice your clients directly from Basil through your QuickBooks Online (QBO) or Stripe account.
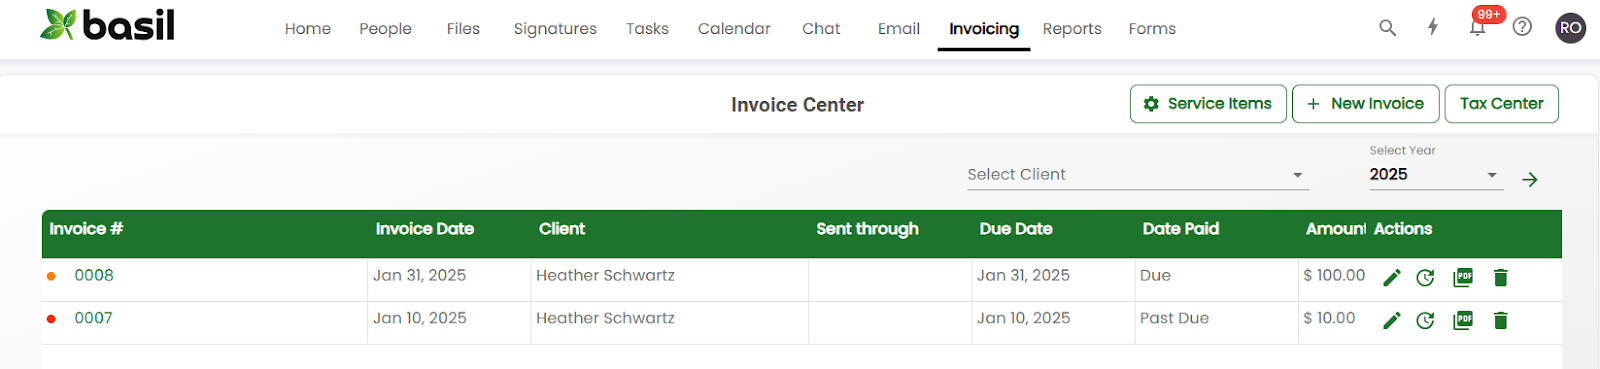
To access the Invoicing features of Basil, click on the ‘Invoicing’ tab at the top.

You will see a list of all the invoices created for the current year. You can filter your invoices by using the 'Select Client' filter at the top of the page to filter by a particular client as well as by calendar year, then click the right arrow.
Service Items:
Before creating an invoice, Service Items must be created. Basil supports the following types of Service Items:
- Fixed Billing - the quantity and rate for these service items can be directly entered on the invoice. Use this if your billing rate for the service is fixed, irrespective of the number of hours spent on the service.
- Hourly Billing - the number of hours logged by the Account Owner and Team Members, multiplied by their respective hourly billing rates, is totaled for this service item. Use this billing method if you want to bill your clients for the total number of hours spent (time card) for all services during the selected time period. The billing rate can be different for each team member and can be configured on the Team Members subtab of the People tab.
- Service Billing - the total number of hours logged by the Account Owner and Team Members to perform a particular service for the client, multiplied by the billing rate for the service. The service performed can be selected from the Task dropdown list, and billing rate for each service can be entered for the Service item. Task template name needs to match the service item. You can create additional custom task templates under Settings to match your service items.
Please note that you cannot select Hourly Billing and Service Billing to invoice a Client during the same billing period, as this will select the same tasks for both the invoices, resulting in duplicate billing for tasks.
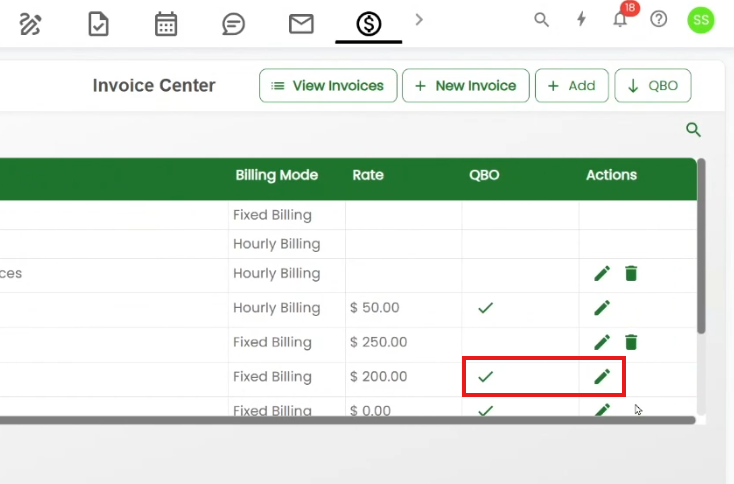
To get to the Service Items table, click the ‘Service Items’ button at the top-right of the Invoicing tab view. To add a Service Item, click +Add at the top. . Pick the Billing Mode from the dropdown and add the required details.
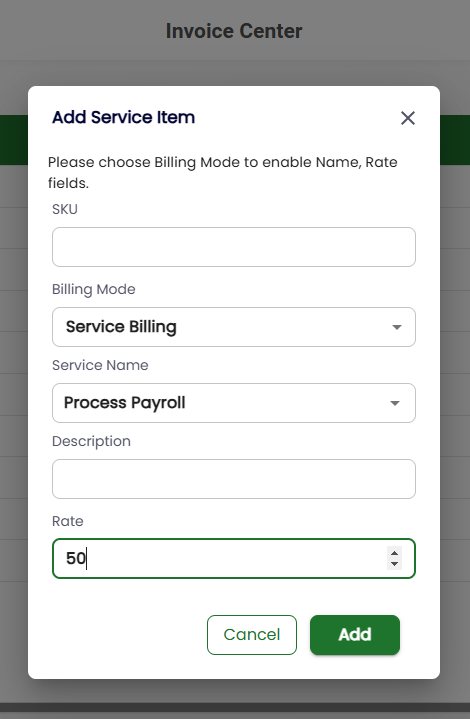
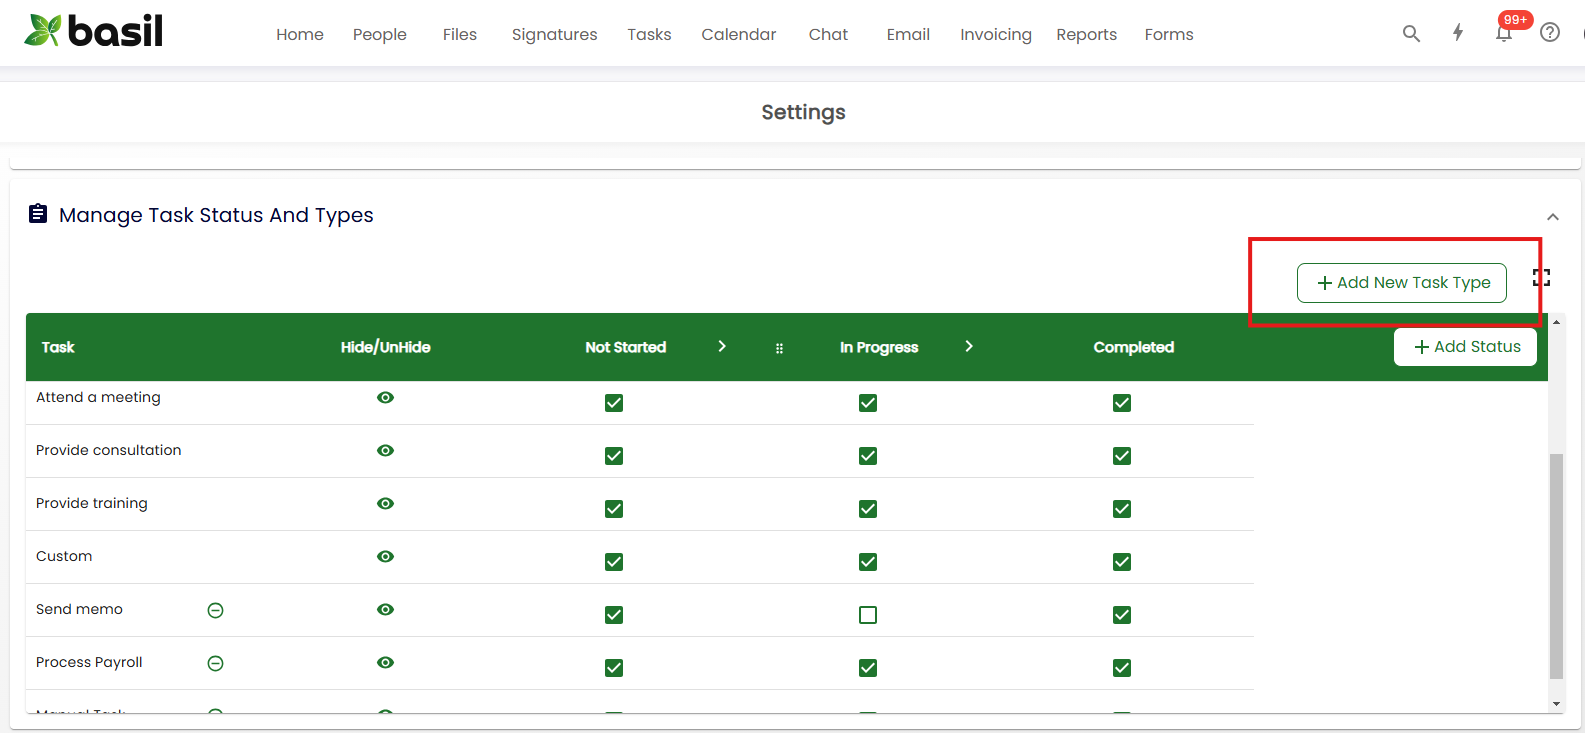
For Billing Mode set to ‘Service Billing’, a ‘Service Name’ dropdown will appear for you to select from. These names are the same as Task Type names, for which the account owner and team members can log time and include it in the services invoice. You can create a new Service name by first creating a new Task Type by going to your User icon at the top-right of Basil, then Settings, then ‘Manage Task Status and Types’, and then ‘+Add New Task Type’..
To Create an Invoice:
To create a new invoice, click on ‘+New Invoice’ at the top-right.
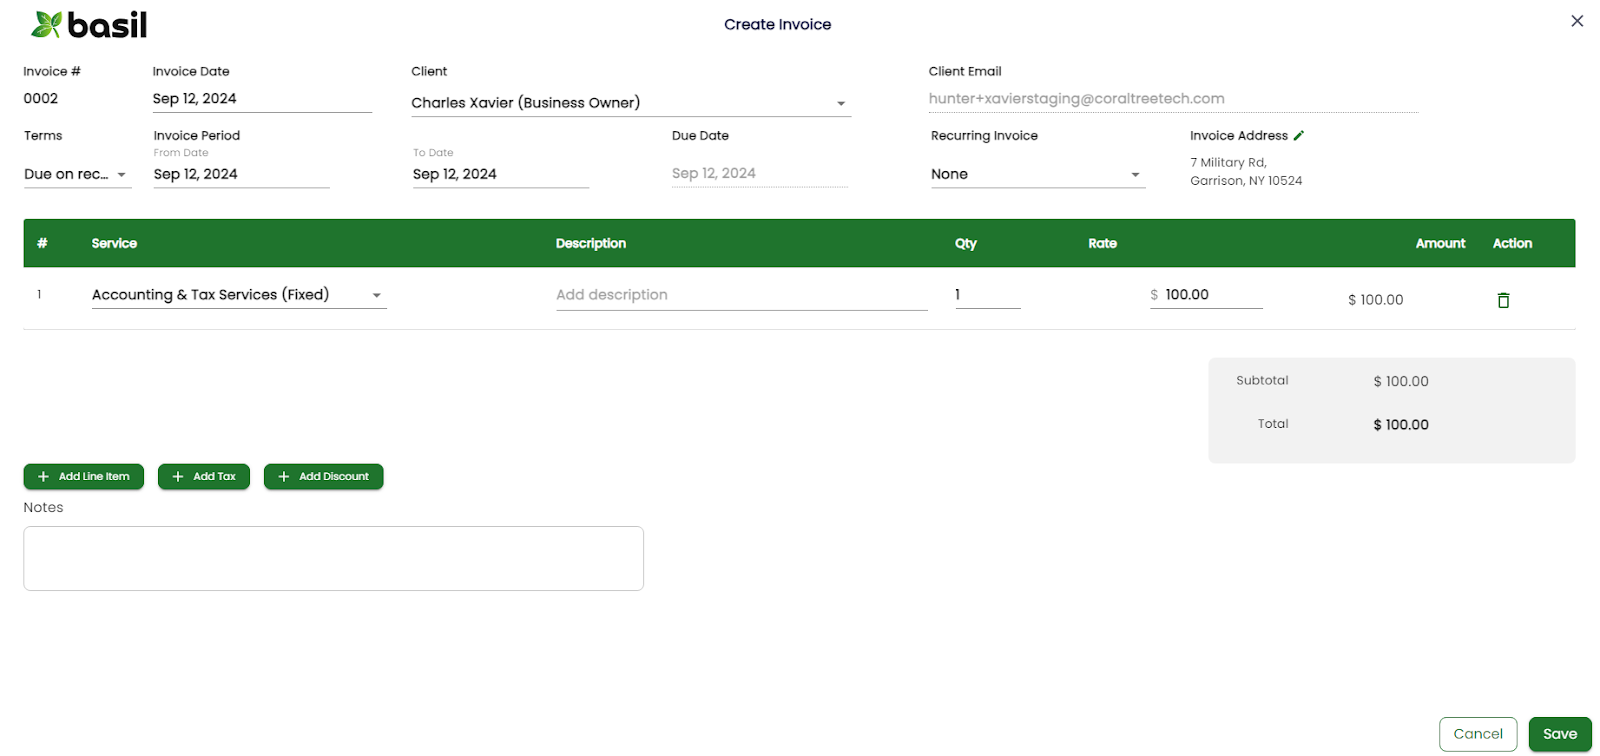
This will bring you to the 'Create Invoice' screen. Here you need to fill out all required fields typically required for an invoice.
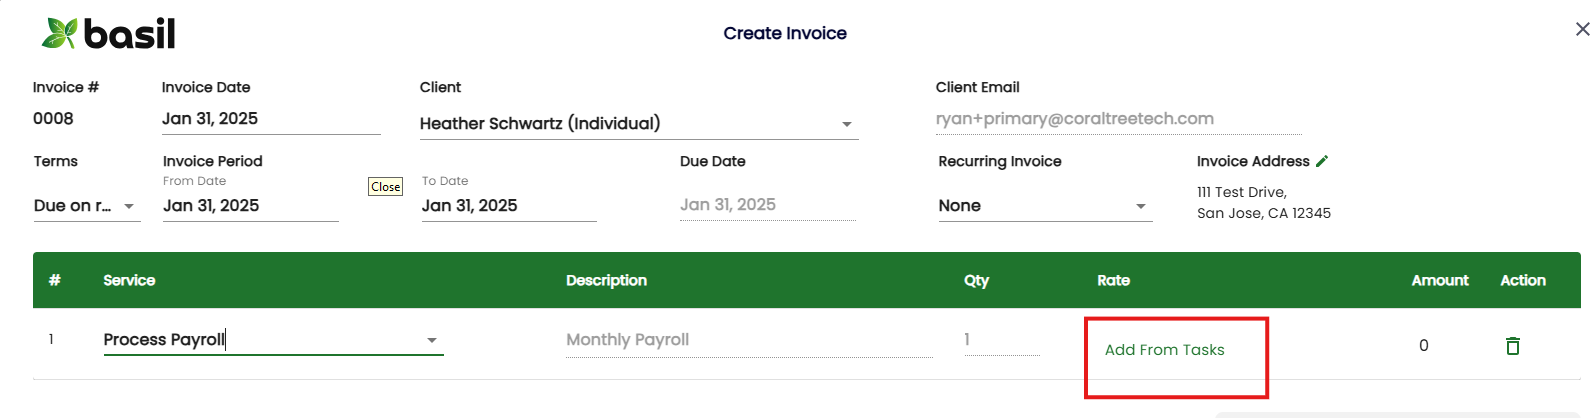
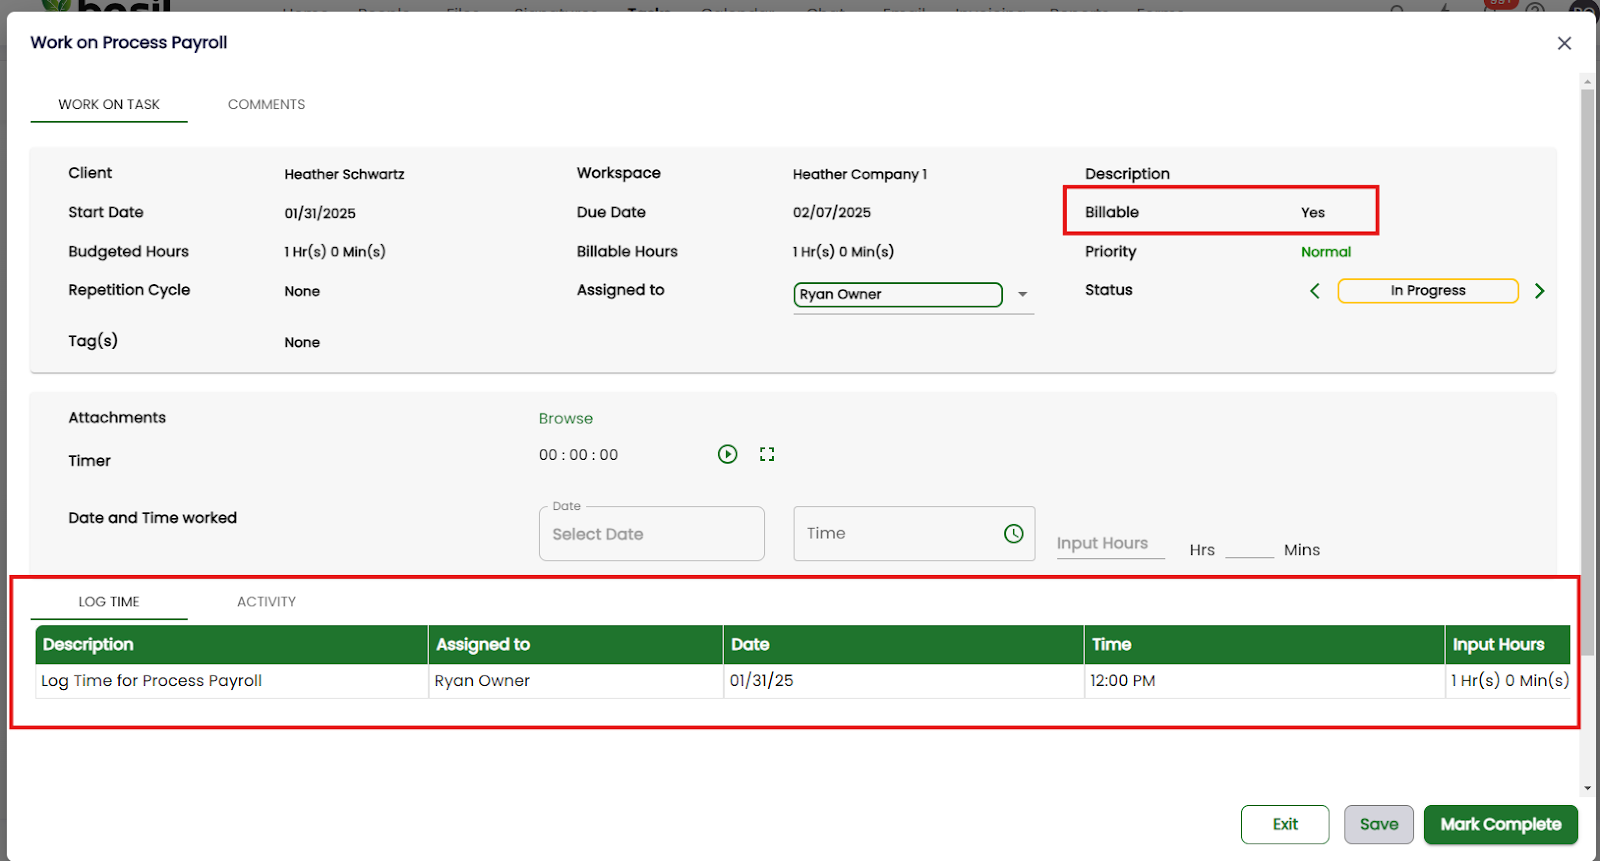
If you select a Service item that has Hourly billing or Service billing mode, the Rate column will change to have a clickable ‘Add from Tasks’ link. Clicking this will list all In Progress and Completed Tasks for this client that have the ‘Billable’ field ticked and time logged in the date range specified in the Bill. You can now select the tasks from the list that need to be added to the Invoice.
If you do not see any Tasks in this view, go to the Tasks tab, and ensure there are In Progress or Completed Tasks assigned to this client that you wish to be billed. Click the edit icon and tick the ‘Billable’ checkbox if it’s not enabled already and click ‘Save’. Then you can open the Task again to work on it and log your time. Please be aware that any time logged while the Task was not set to billable would not reflect when adding Tasks to the invoice.
You can add multiple line items for each invoice by filling out the first line and then clicking on the ‘+Add Line Item’ option.
If you need to add a tax to the invoice, you can click the ‘+Add Tax’ option. This will give you two options: Sales Tax, and GST (goods and services tax). Adding a tax will update the Subtotal/Total area with a new line and a field where you can select a tax agency and rate of tax created in the Tax Center.
Please note that before you can add Sales Tax, the agency for which you are collecting taxes needs to be created in the Tax Center, as described later in this section.
If you want to add a discount to the invoice, you can do so via the ‘+Add Discount’ button. Adding a discount will update the Subtotal/Total area with a new line and a field where you can add a discount. Discount amounts can include decimals.
You can also leave notes about this particular invoice in the 'Notes' section. These notes will be included in the invoice sent to the Client.
Once you have added all the required information for the invoice you wish to generate, click ‘Save’ at the bottom right. The invoice will now appear in the list. You can view the invoice by clicking the Invoice number or edit the invoice by clicking the pencil icon.
Updating payment details:
For invoices sent through Stripe, payment details and status will be updated automatically, once payment is received in Stripe. For invoices sent through QBO or through other means, payment details need to be updated manually. To do an update, click the ‘Update Payment Details’ icon for the invoice and enter the details on the pop-up screen, and click ‘Update’.
Please note: Once you enter a date into 'Date Paid', the invoice can no longer be edited.
Integration with QuickBooks Online (QBO):
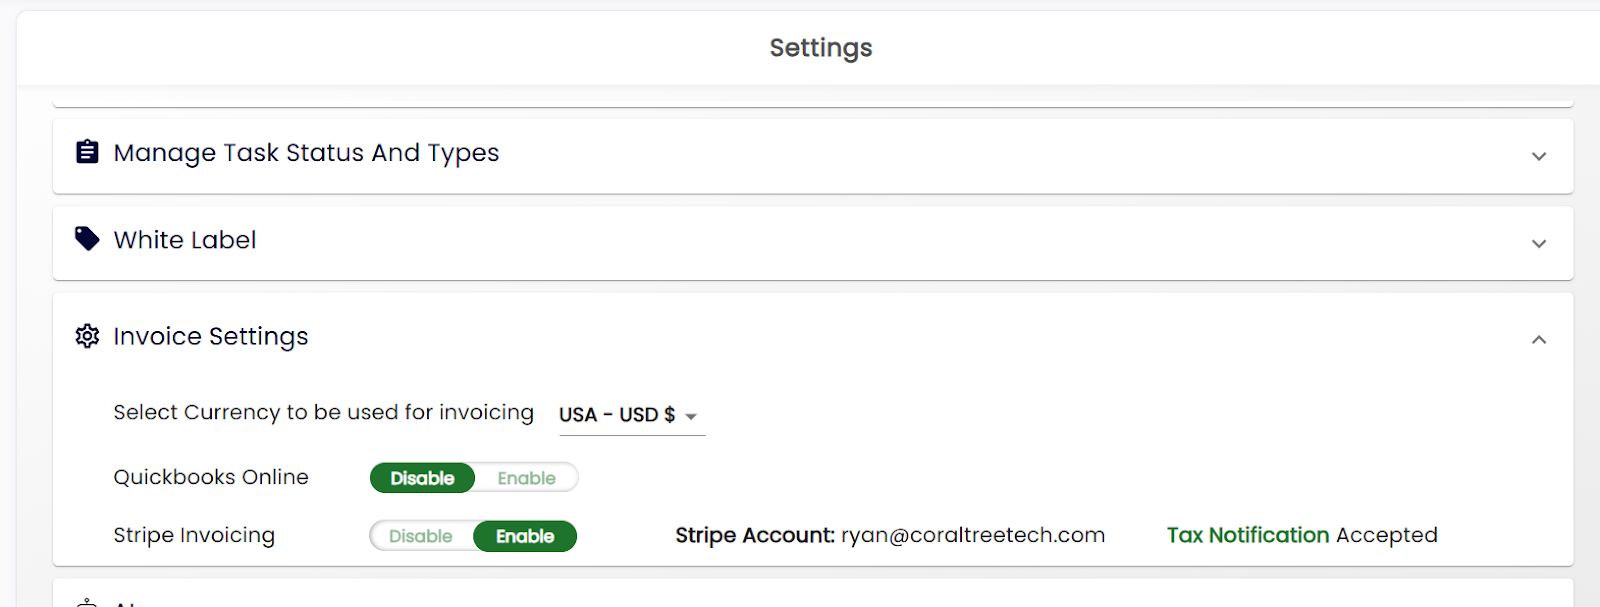
You can enable QuickBooks Online (QBO) integration under Settings for your account. Go to Invoice Settings and Enable QBO, login to your QBO account when prompted to complete the integration.

Once enabled, when you go to the People tab, you will see a QBO button at the top-right which you can use to merge and import your list of clients in QuickBooks Online. Clients who have been successfully merged will have a green 'qb' icon next to their name.

You will need to import your Products & Services from QBO as Service Items in Basil. Go to the Billing tab, click 'Service Items', and click the 'QBO' button at the top-right to import. Once imported, you can set up the Basil Billing Mode for these service items to be Hourly Billing or Service Billing.

Invoices for QBO clients can only include service items imported from QBO, and can only be sent to QBO. They will need to be processed further to include any taxes on the QBO side before they can be sent to the end clients for payment.
Payment status of invoices sent manually or through QBO will need to be updated manually. To update payment status, click the update icon for the invoice and enter the payment date and status.
Integration with Stripe:
Basil can be integrated with your Stripe account for invoicing your clients. To enable Stripe, go to Settings and under Invoice Setting, enable Stripe. Then log into your Stripe account to complete the integration. If you do not have an account setup on Stripe, you can create a new account by providing all the information needed, and then complete the integration with Basil.
Client invoices (non-QBO) can now be sent through Stripe by clicking ‘Send to Stripe’. Please note that you can include sales tax or GST in your invoice before they are sent to Stripe for payment collection.
The payment status of invoices sent through Stripe will be updated automatically.
Tax Center:
You can set up Tax agencies, view tax collected and track taxes due to tax agencies under the Tax Center, available under the Invoicing Tab. If you are required to collect sales tax or GST, Basil helps you keep accurate track of taxes collected on behalf of Tax agencies and the taxes you paid to these agencies.
Please note that you are responsible for collecting the correct amount of sales tax on invoices sent to your clients, as per nexus rules for the state, and paying them to the tax agency on time
- For invoices sent through Stripe, add the sales tax before sending the invoice to Stripe. Tax Agencies and Tax collected details are maintained in the Basil Tax Center.
- For invoices sent through QBO, add the sales tax to the invoice when you login to your QBO account to process the invoice. Tax Agencies and Tax collected details are maintained by QBO.
To add a tax agency, click the ‘Manage Tax Agencies’, and add the name of the Agency, Registration number, State and the Tax percent. Enter the Tax periods with start and end dates, and payment due dates for each period. You can add additional tax agencies if needed. As you collect taxes on invoices, these will appear as line items on the Tax Center, with a running Tax Balance you owe to the agency.
You are responsible for making a payment to the Tax Agency for the taxes you collect on their behalf. Once you make a payment to the agency, click the ‘Add Tax Payment’ button to enter the payment details, which will offset the running tax balance. Make sure that you maintain accurate records of tax collection and payments at all times as required by the state laws governing sales taxes.